These are pics of my retrofitting a serviceable,
salvaged O2 system that I got at
ASOD's summer sale from a 55 Series Baron to a B55 using all the original
factory parts. I have been wanting to do this project for several years since I
often fly at 10,000' to 13,000', at times, for as much as 5 hours, with several
of those hours sometimes at night. I'm
not getting any younger and being oxygen compromised for my approach and landing
is not a good place to be.
Here's a review of the FAA regs on oxygen:
The FAA requires that all pilots flying their aircraft above 12,500 feet for
30 minutes or longer or at 14,000 feet or above during the entire flight must
use supplemental oxygen. The amount required is 1 liter of oxygen per minute for
every 10,000 feet. For example, at 18,000 feet there should be a flow of 1.8
liters per minute of oxygen available via a standard breathing device. The FAA
requires there should be a device so attached to each breathing device that
visually shows the flow of oxygen. (Aerox flow meters meet this FAA
requirement.) The FAA also regulates that passengers must have supplemental
oxygen available over 15,000 feet and that it is recommended that supplemental
oxygen be used at night at altitudes over 5,000 feet.
Read more about Low Cost Pulse Oximeters and
Hypoxia HERE
Read about and listen to this chilling hypoxic
pilot audio conversation with ATC
HERE
Only an A&P/IA or a person supervised by an
A&P/IA can do the following project. No STC is needed because this is original
factory equipment installed on the same airframe in the same way as the factory
fitted it.
Big thanks to my Beech buddy Al D., who helped
me extract this system in 100F Texas heat and to Lucky at
ASOD who gave me the CSOB deal
of the century on this system (did not include bottle). The price was so great I
can't even publicize it!
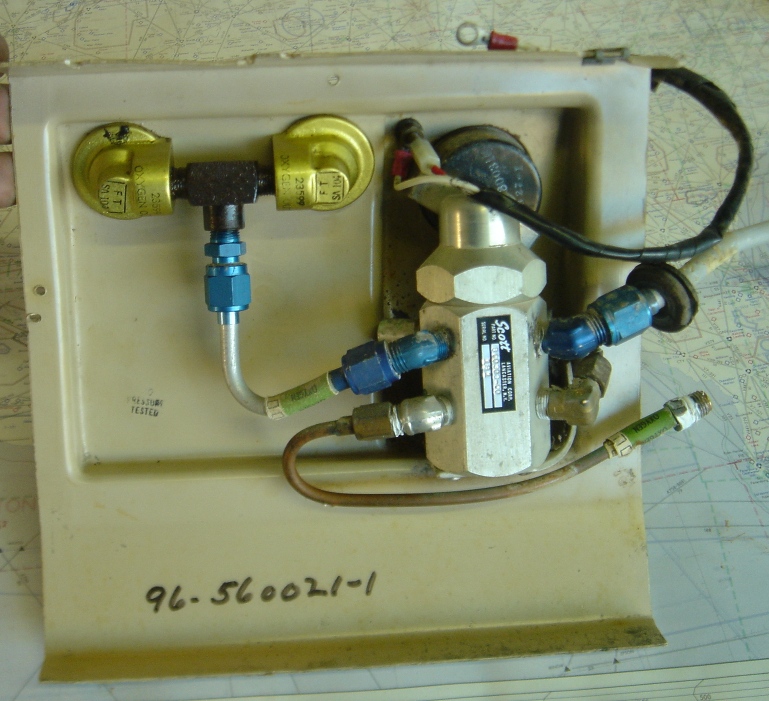
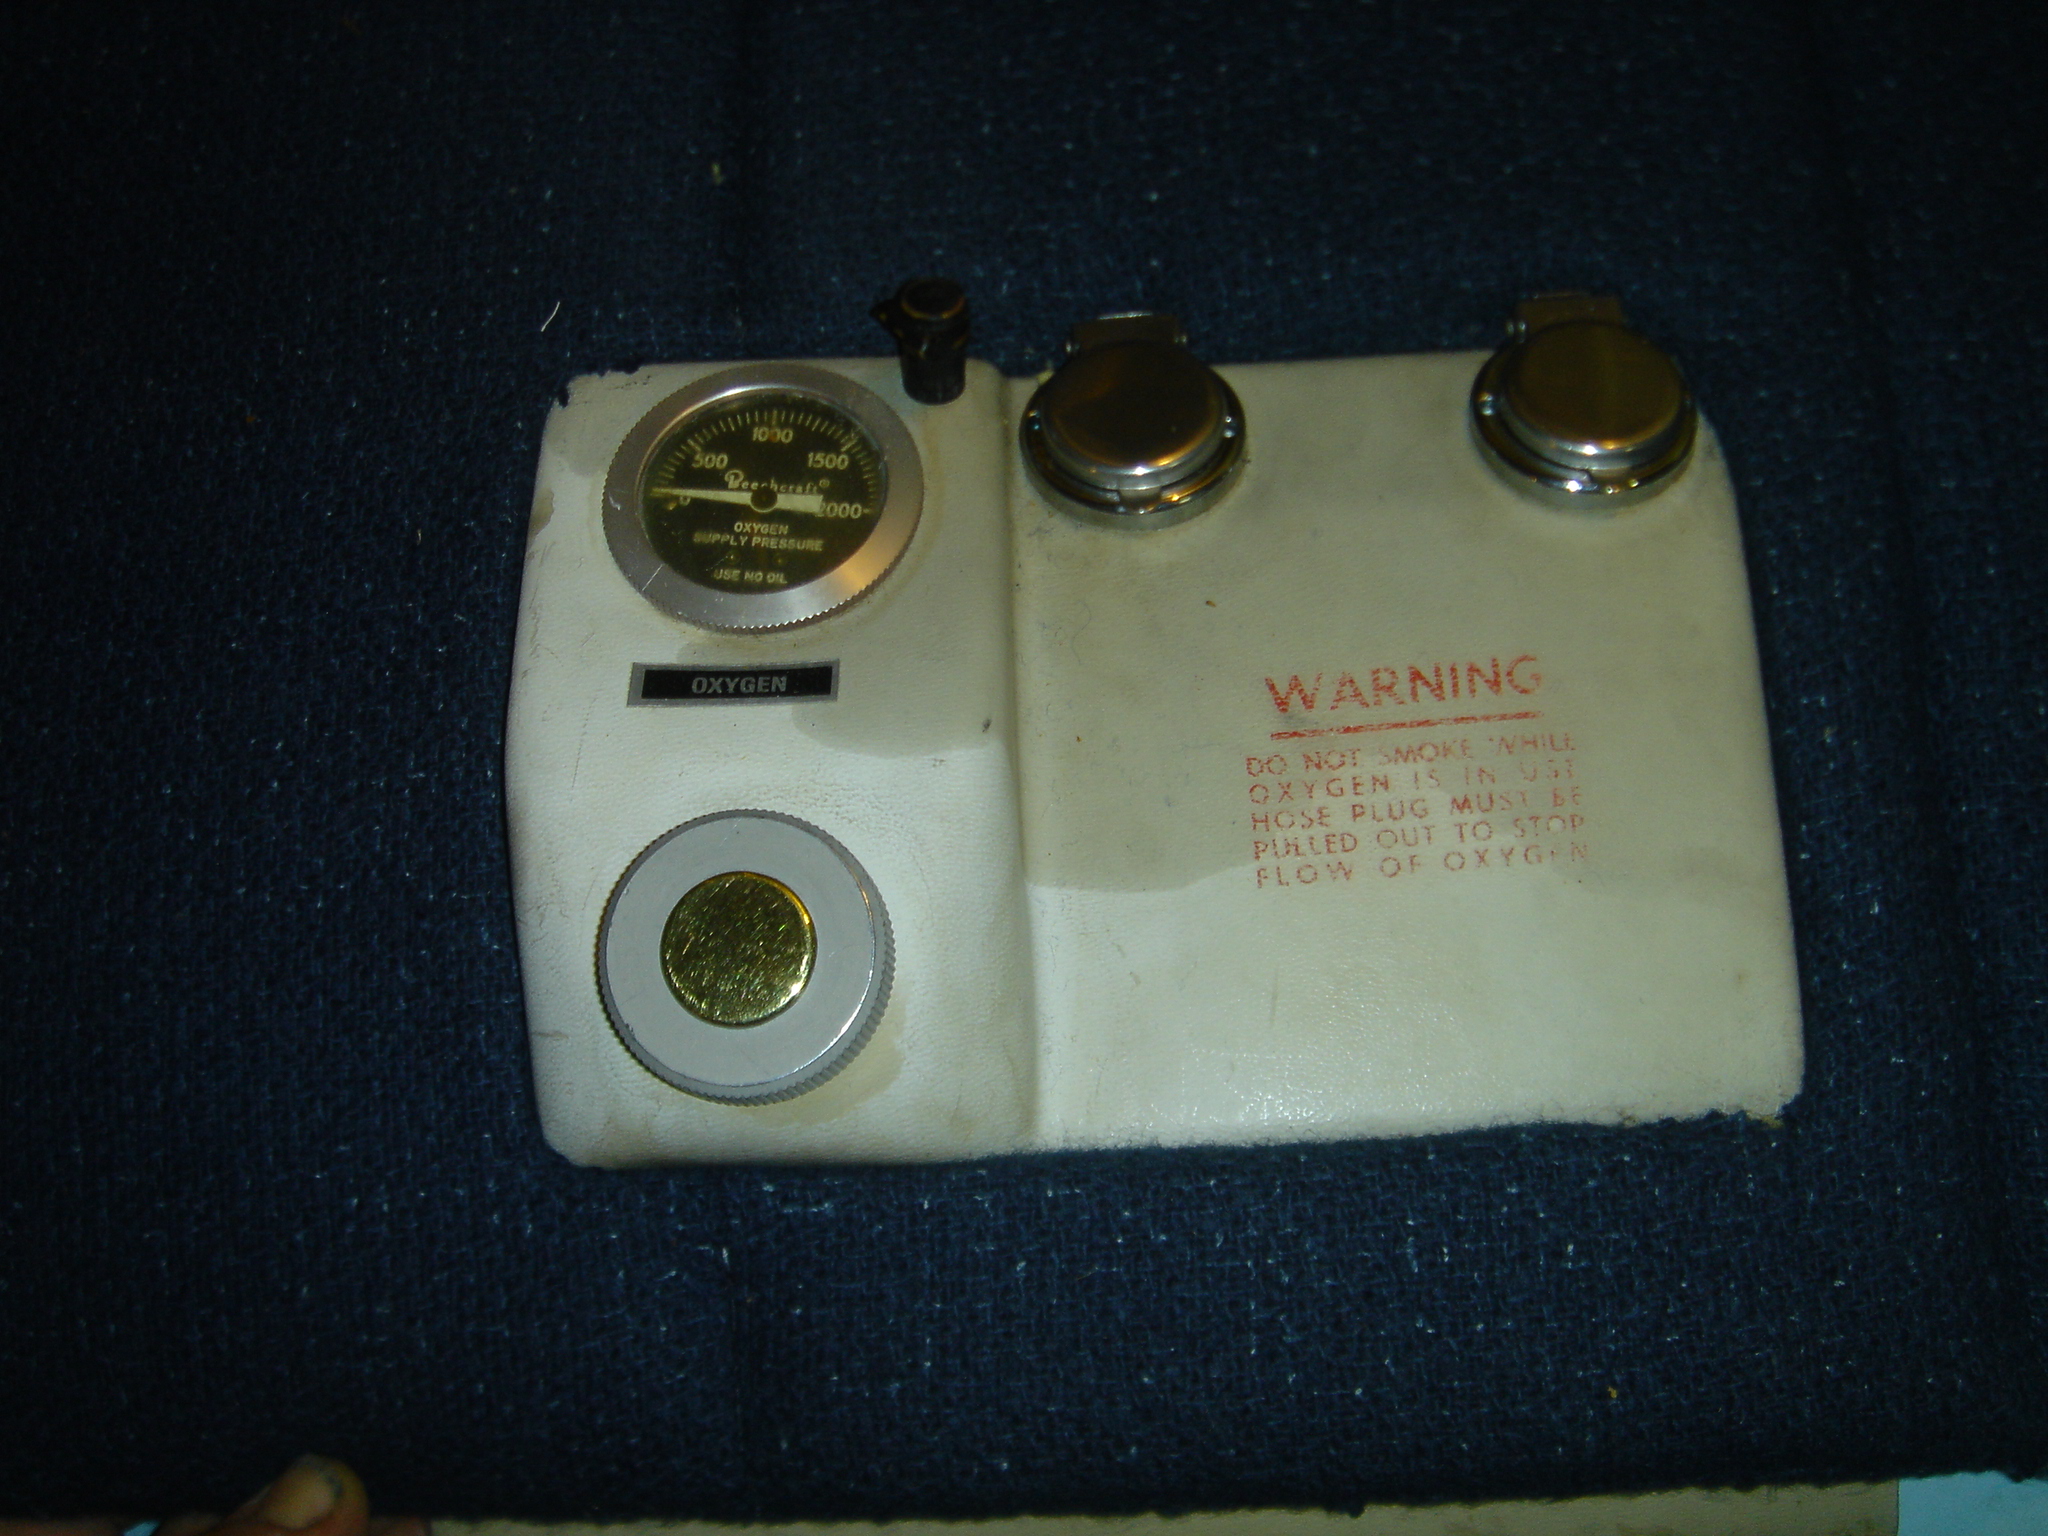
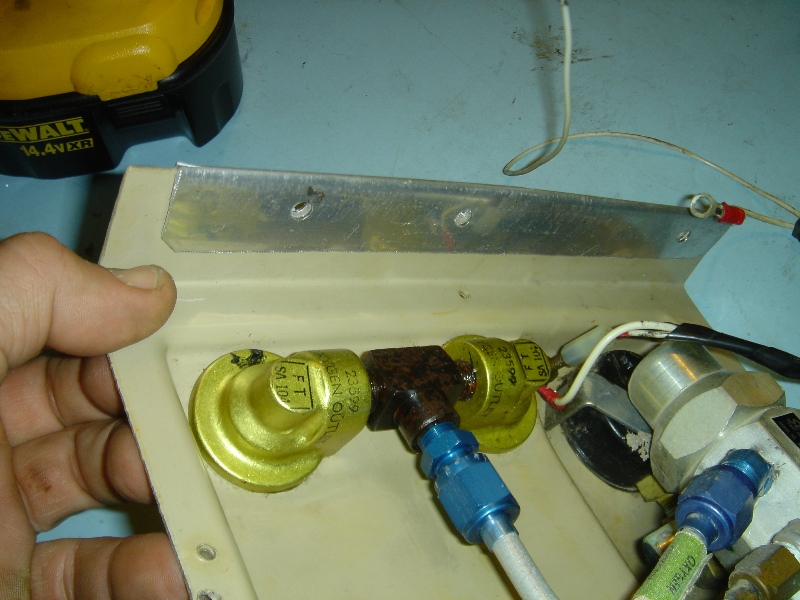
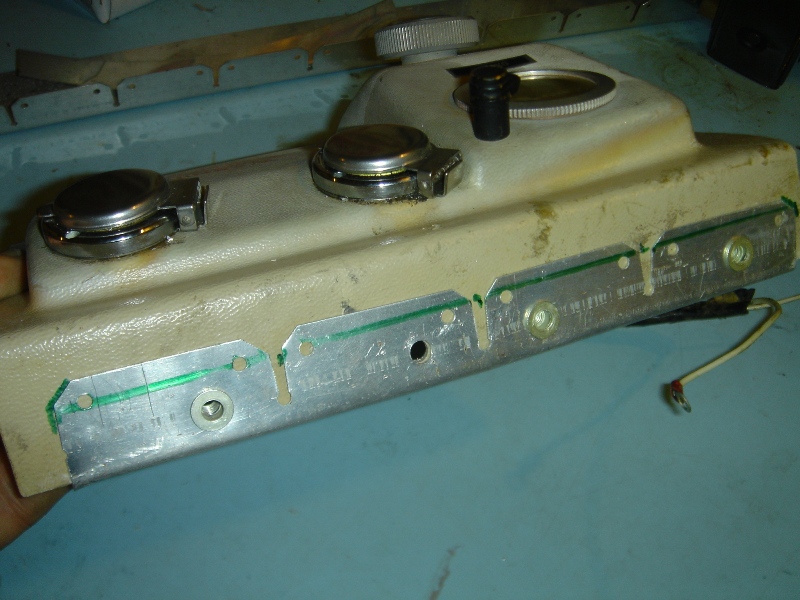
This is the heart of the factory Baron Oxygen system, PN: 96-560021-1, the
control panel, a Scott regulator and plumbing to the individual oxygen ports. On
the right is the test fitting of the unit to it's mounting location. The top and
bottom lips fit between two fuselage ribs and a vertical rib. Note the
instrument post light wiring. Ground will go to one of the mounting screws in
the top rib and the positive will come off the fuel selector instrument post
lighting circuit wire that runs just below the oxygen control panel mounting
area..
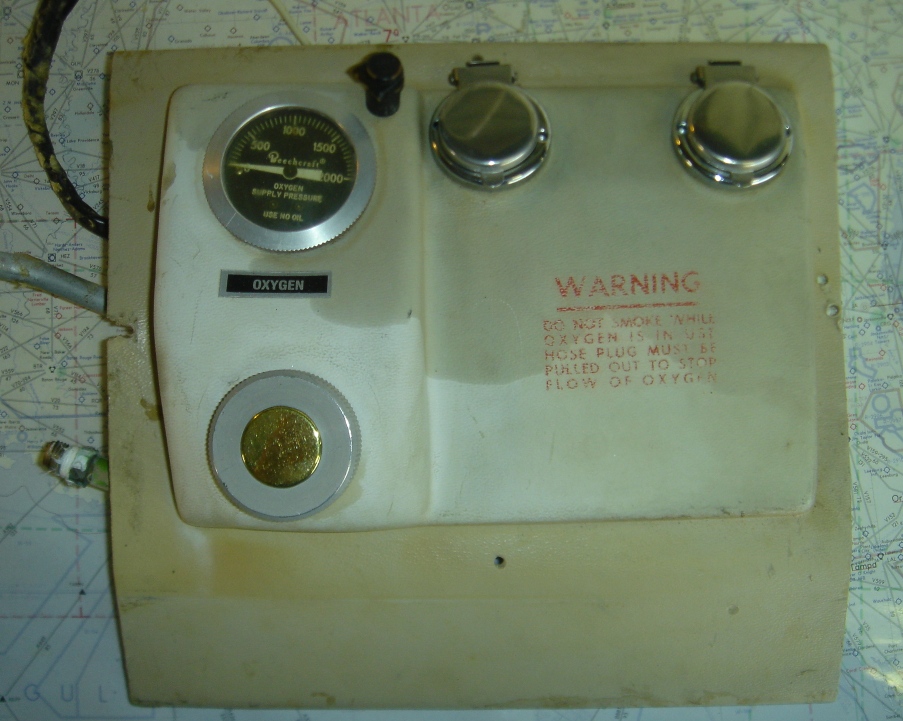
Here is the face of the unit and my template solution for getting the hole cut
in the upholstery panel perfect. Take a piece of cardboard or a manila folder
and lay it in the upholstery panel channel. I placed it right up to the place in
the channel where the channel begins to angle. This angle change is my
orientation point. Now, I cut the folder to fit right over the Oxygen frame. I
was not worried if I had to cut cardboard a few times to get it right, this is
better than messing up my interior panel.
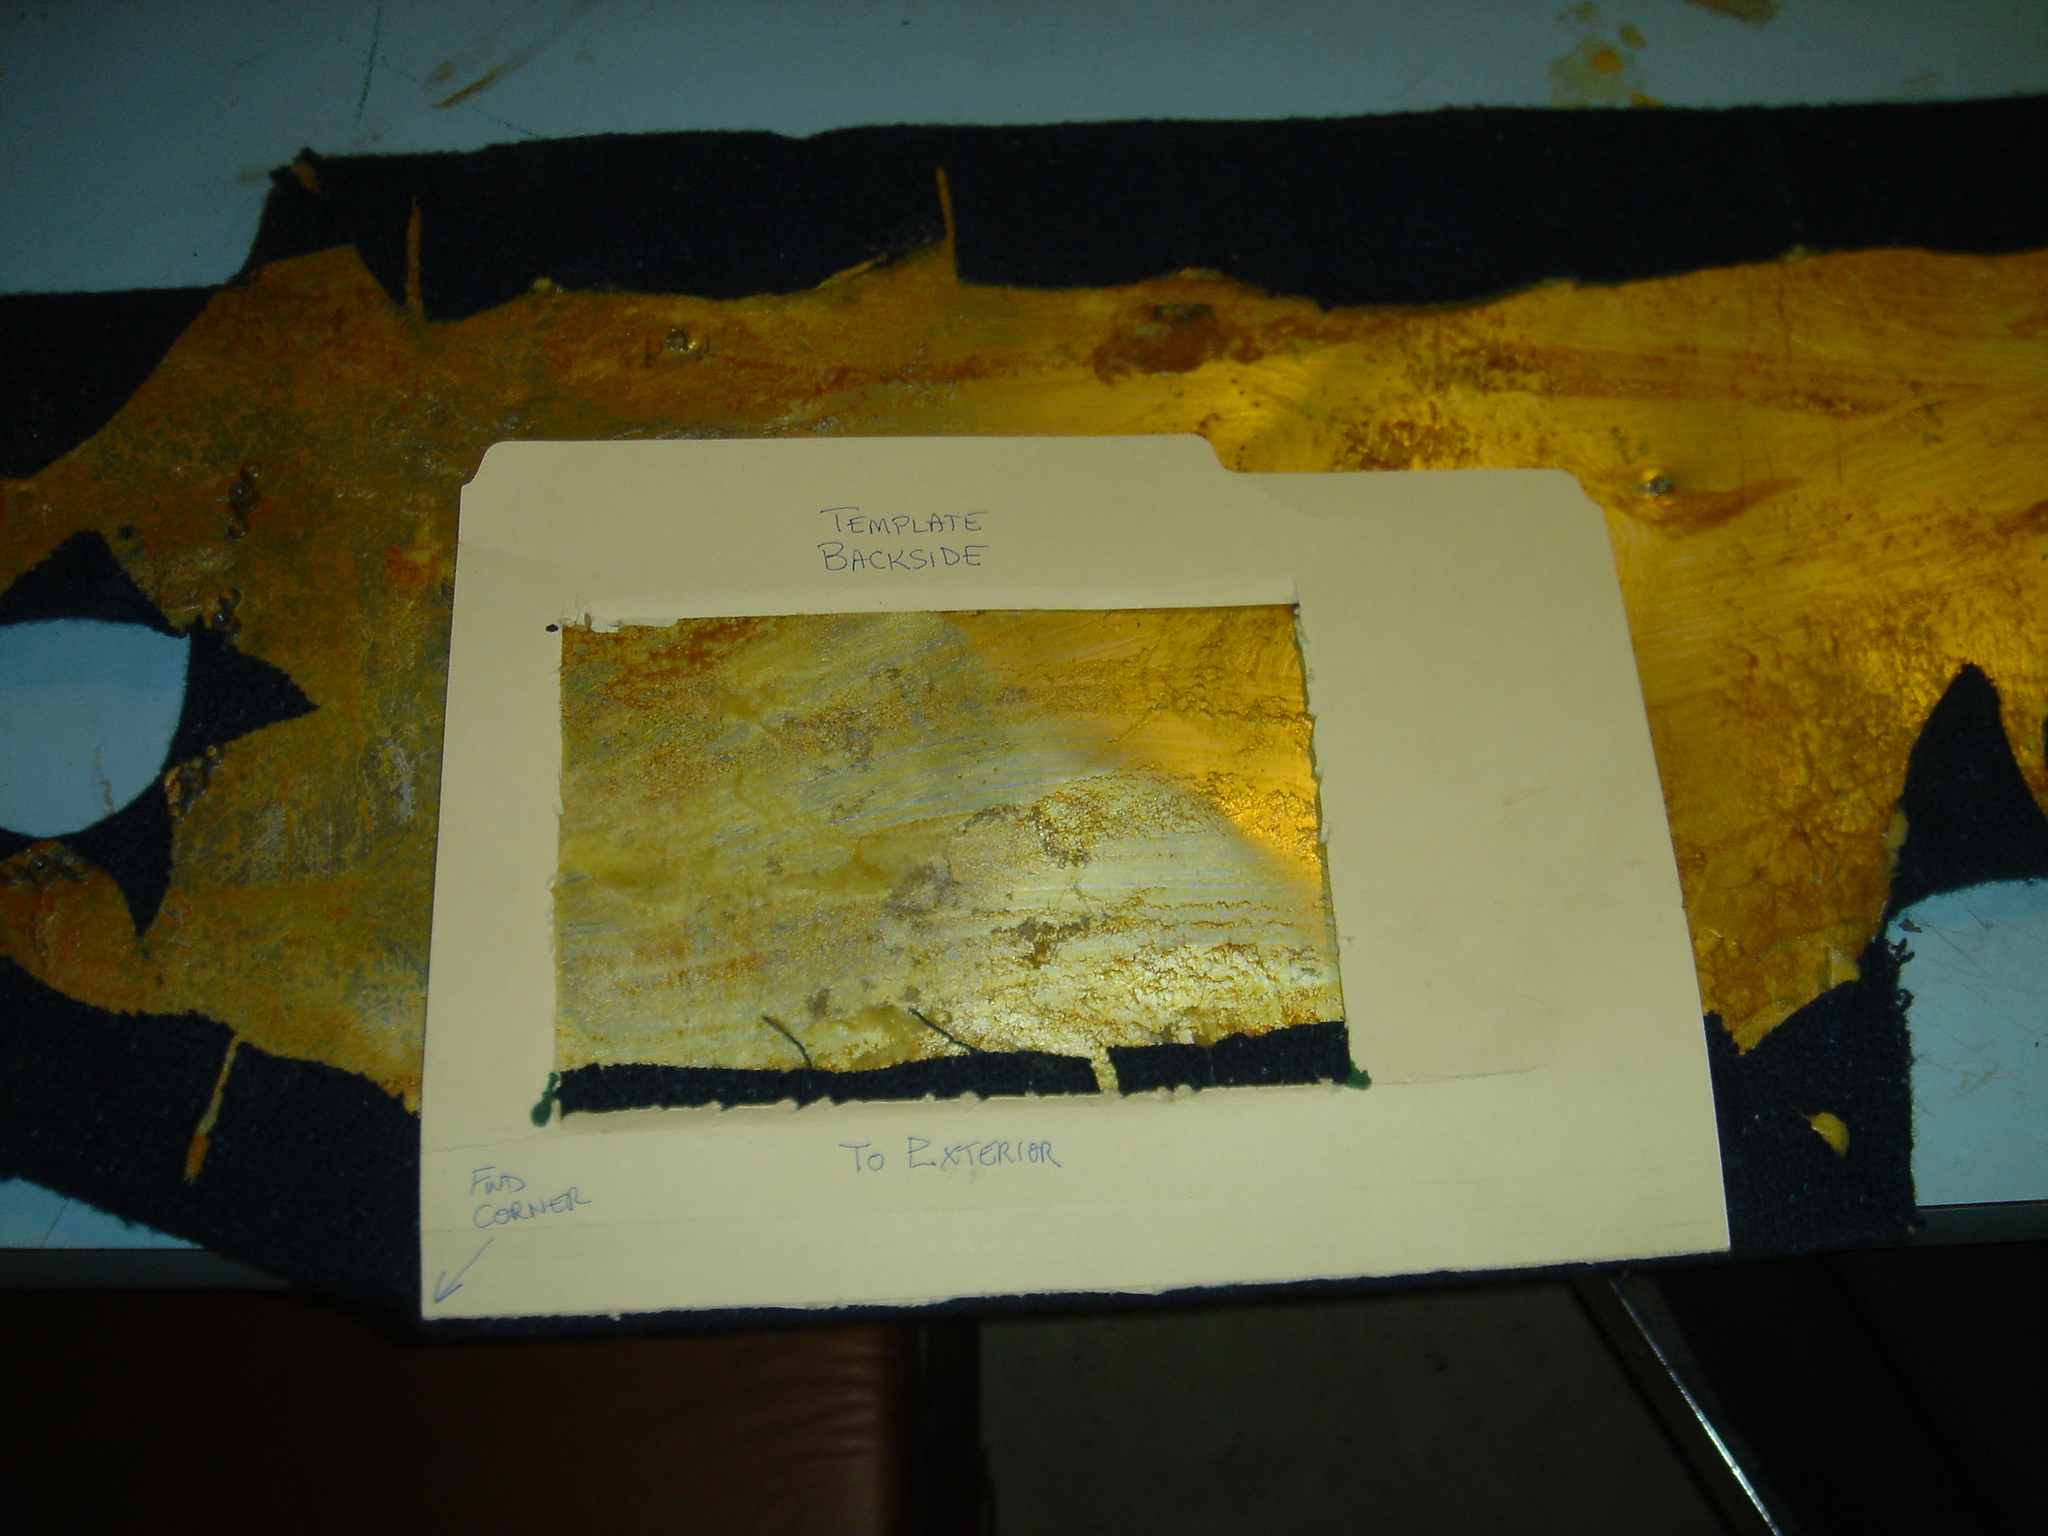
After completing my template, I took the face of it and placed it on the BACK
SIDE of my upholstery panel. I aligned the angle corner to the angle corner of
the panel. I then traced with a sharpie marker the area to be cut out. Next, I
drilled pilot holes in the metal panel back and got my tin snips and begin
cutting only the metal, leaving the fabric intact for now.
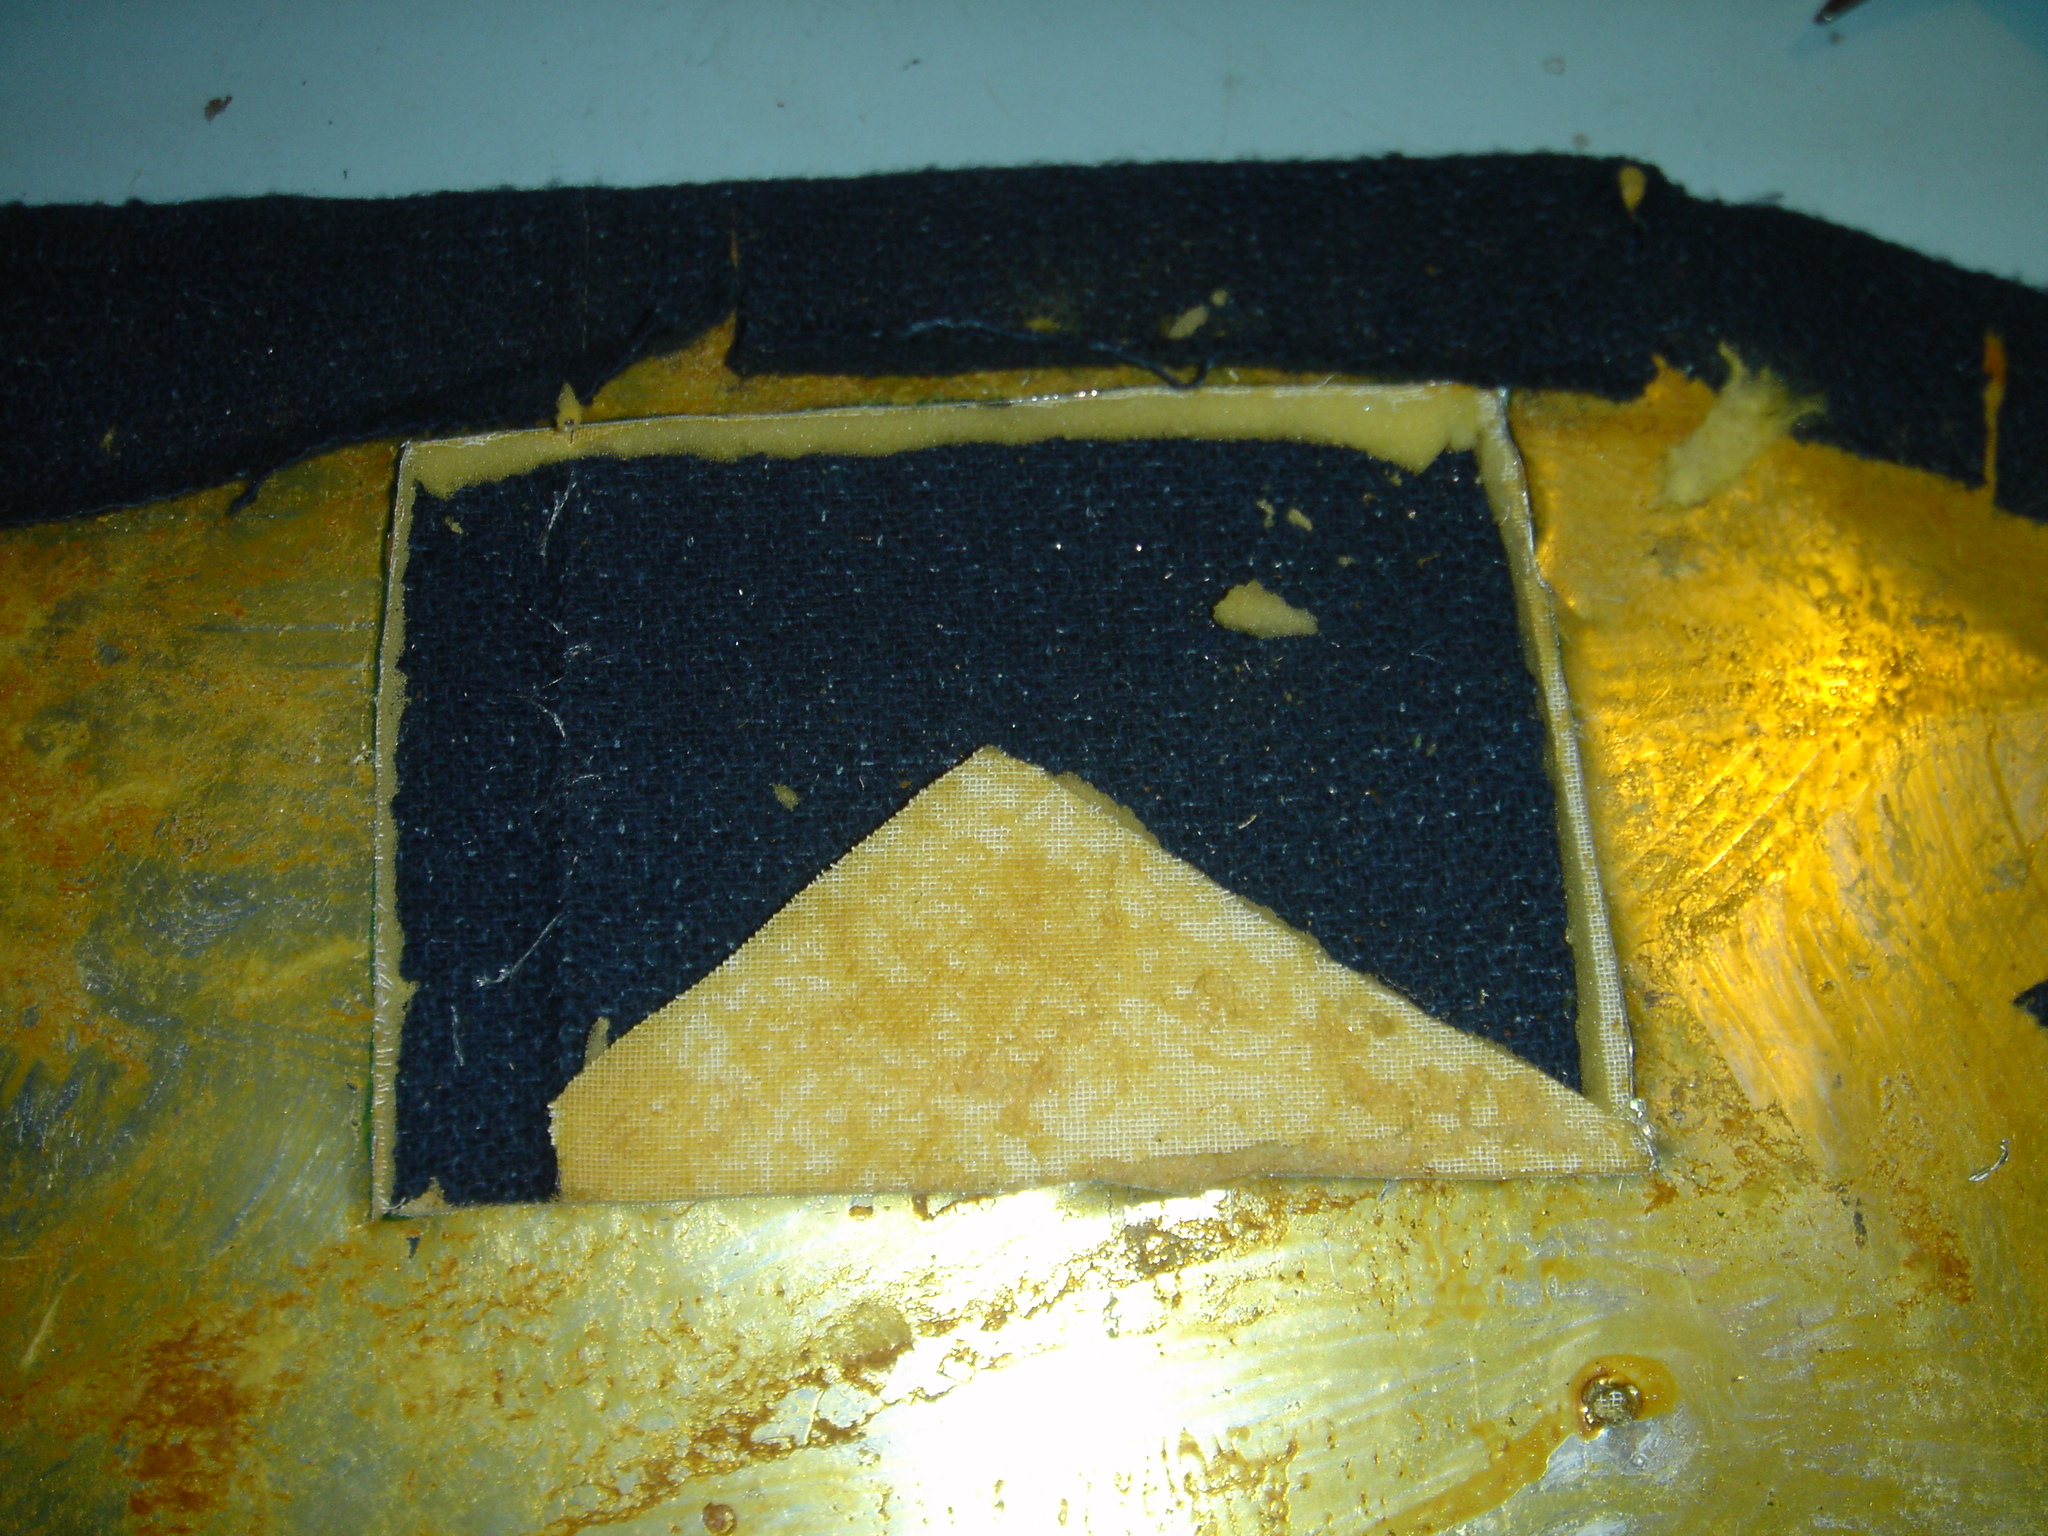
I cut the fabric in an "X" pattern and pulled each triangular piece of fabric
back and glued it to the metal panel back with 3M #77 spray adhesive.
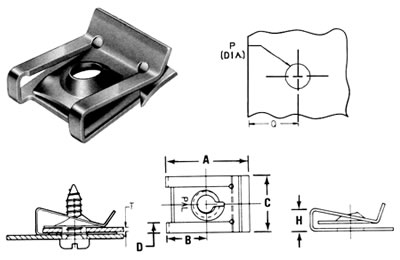
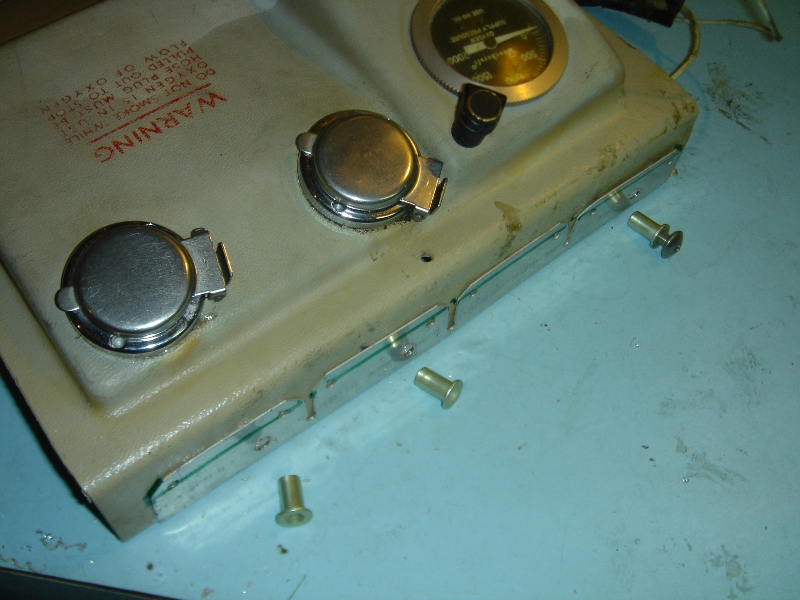
The top mounting lip of my Oxygen control panel was pretty raggedy from the
extraction and used "U" type tinnerman fasteners.
I wanted to reinforce the lip and give it a more robust fastening system so I
created a reinforcing piece of aluminum sheet metal by folding 0.016 stock over
the plastic lip and drilled three new holes through the "sandwich".
My IA provided me with three rivnuts, I believe they were 3/16" that took a #8
or #10 screw. I test fit the control panel to the airframe and marked the front
rib location with green sharpie.
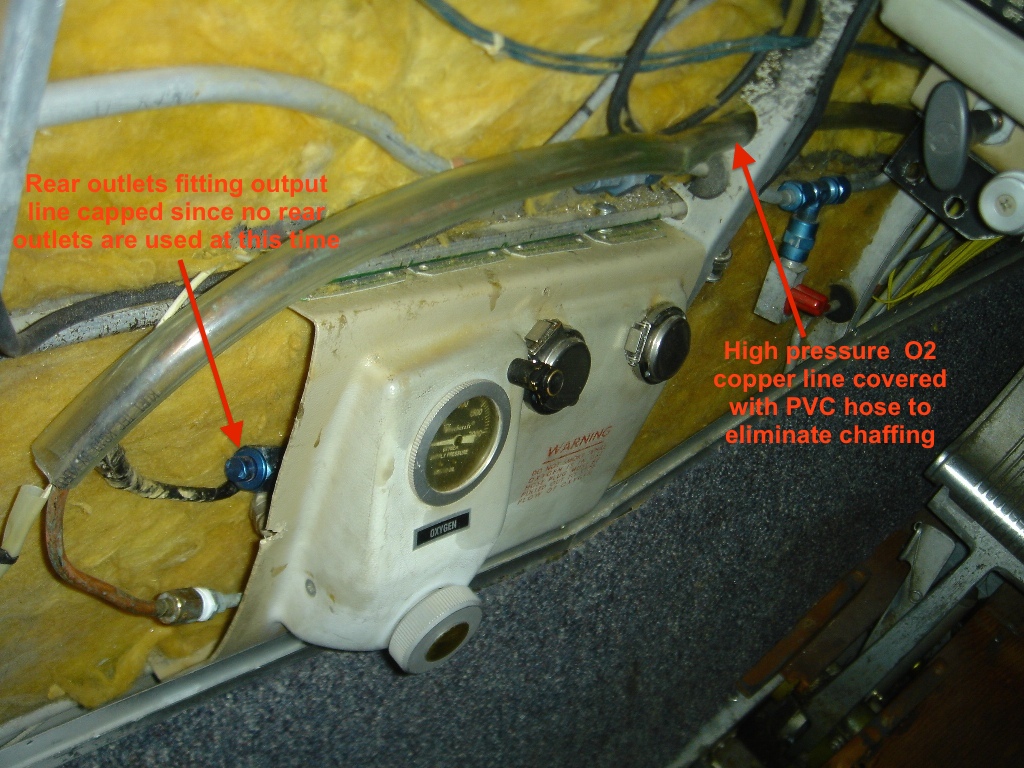
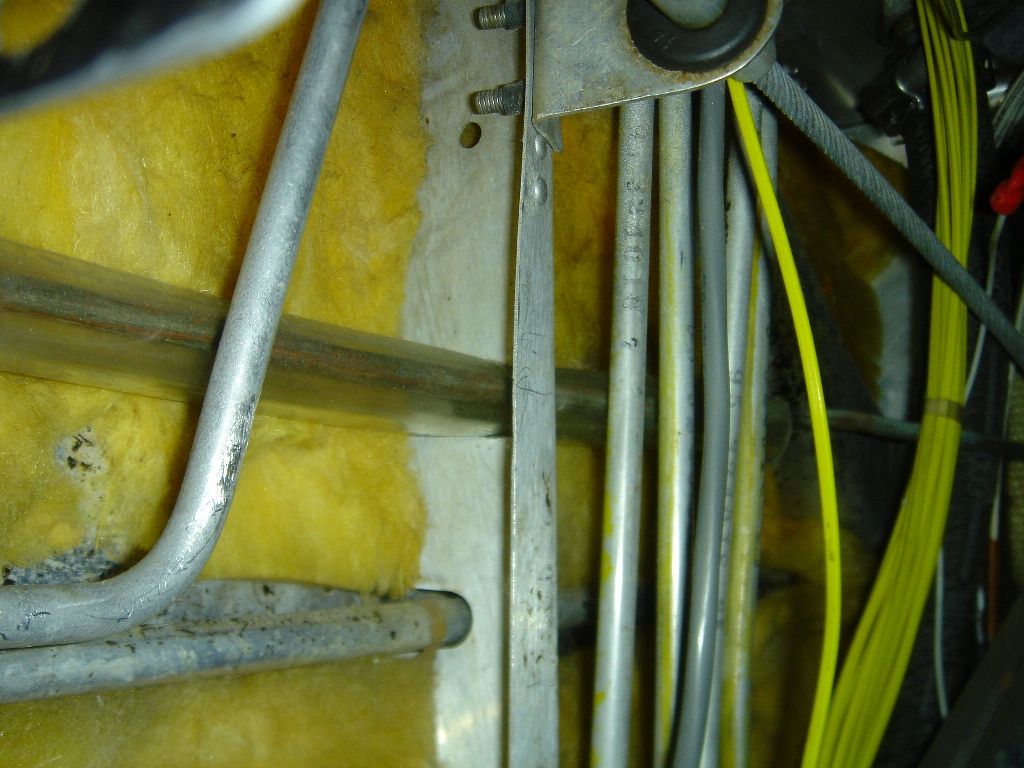
I then placed the control panel in place and drilled holes in the rib as the
factory did. Additionally, I added chafe protection over the copper oxygen line
wherever it passed through the airframe. A grommet would likely perform the
same function.
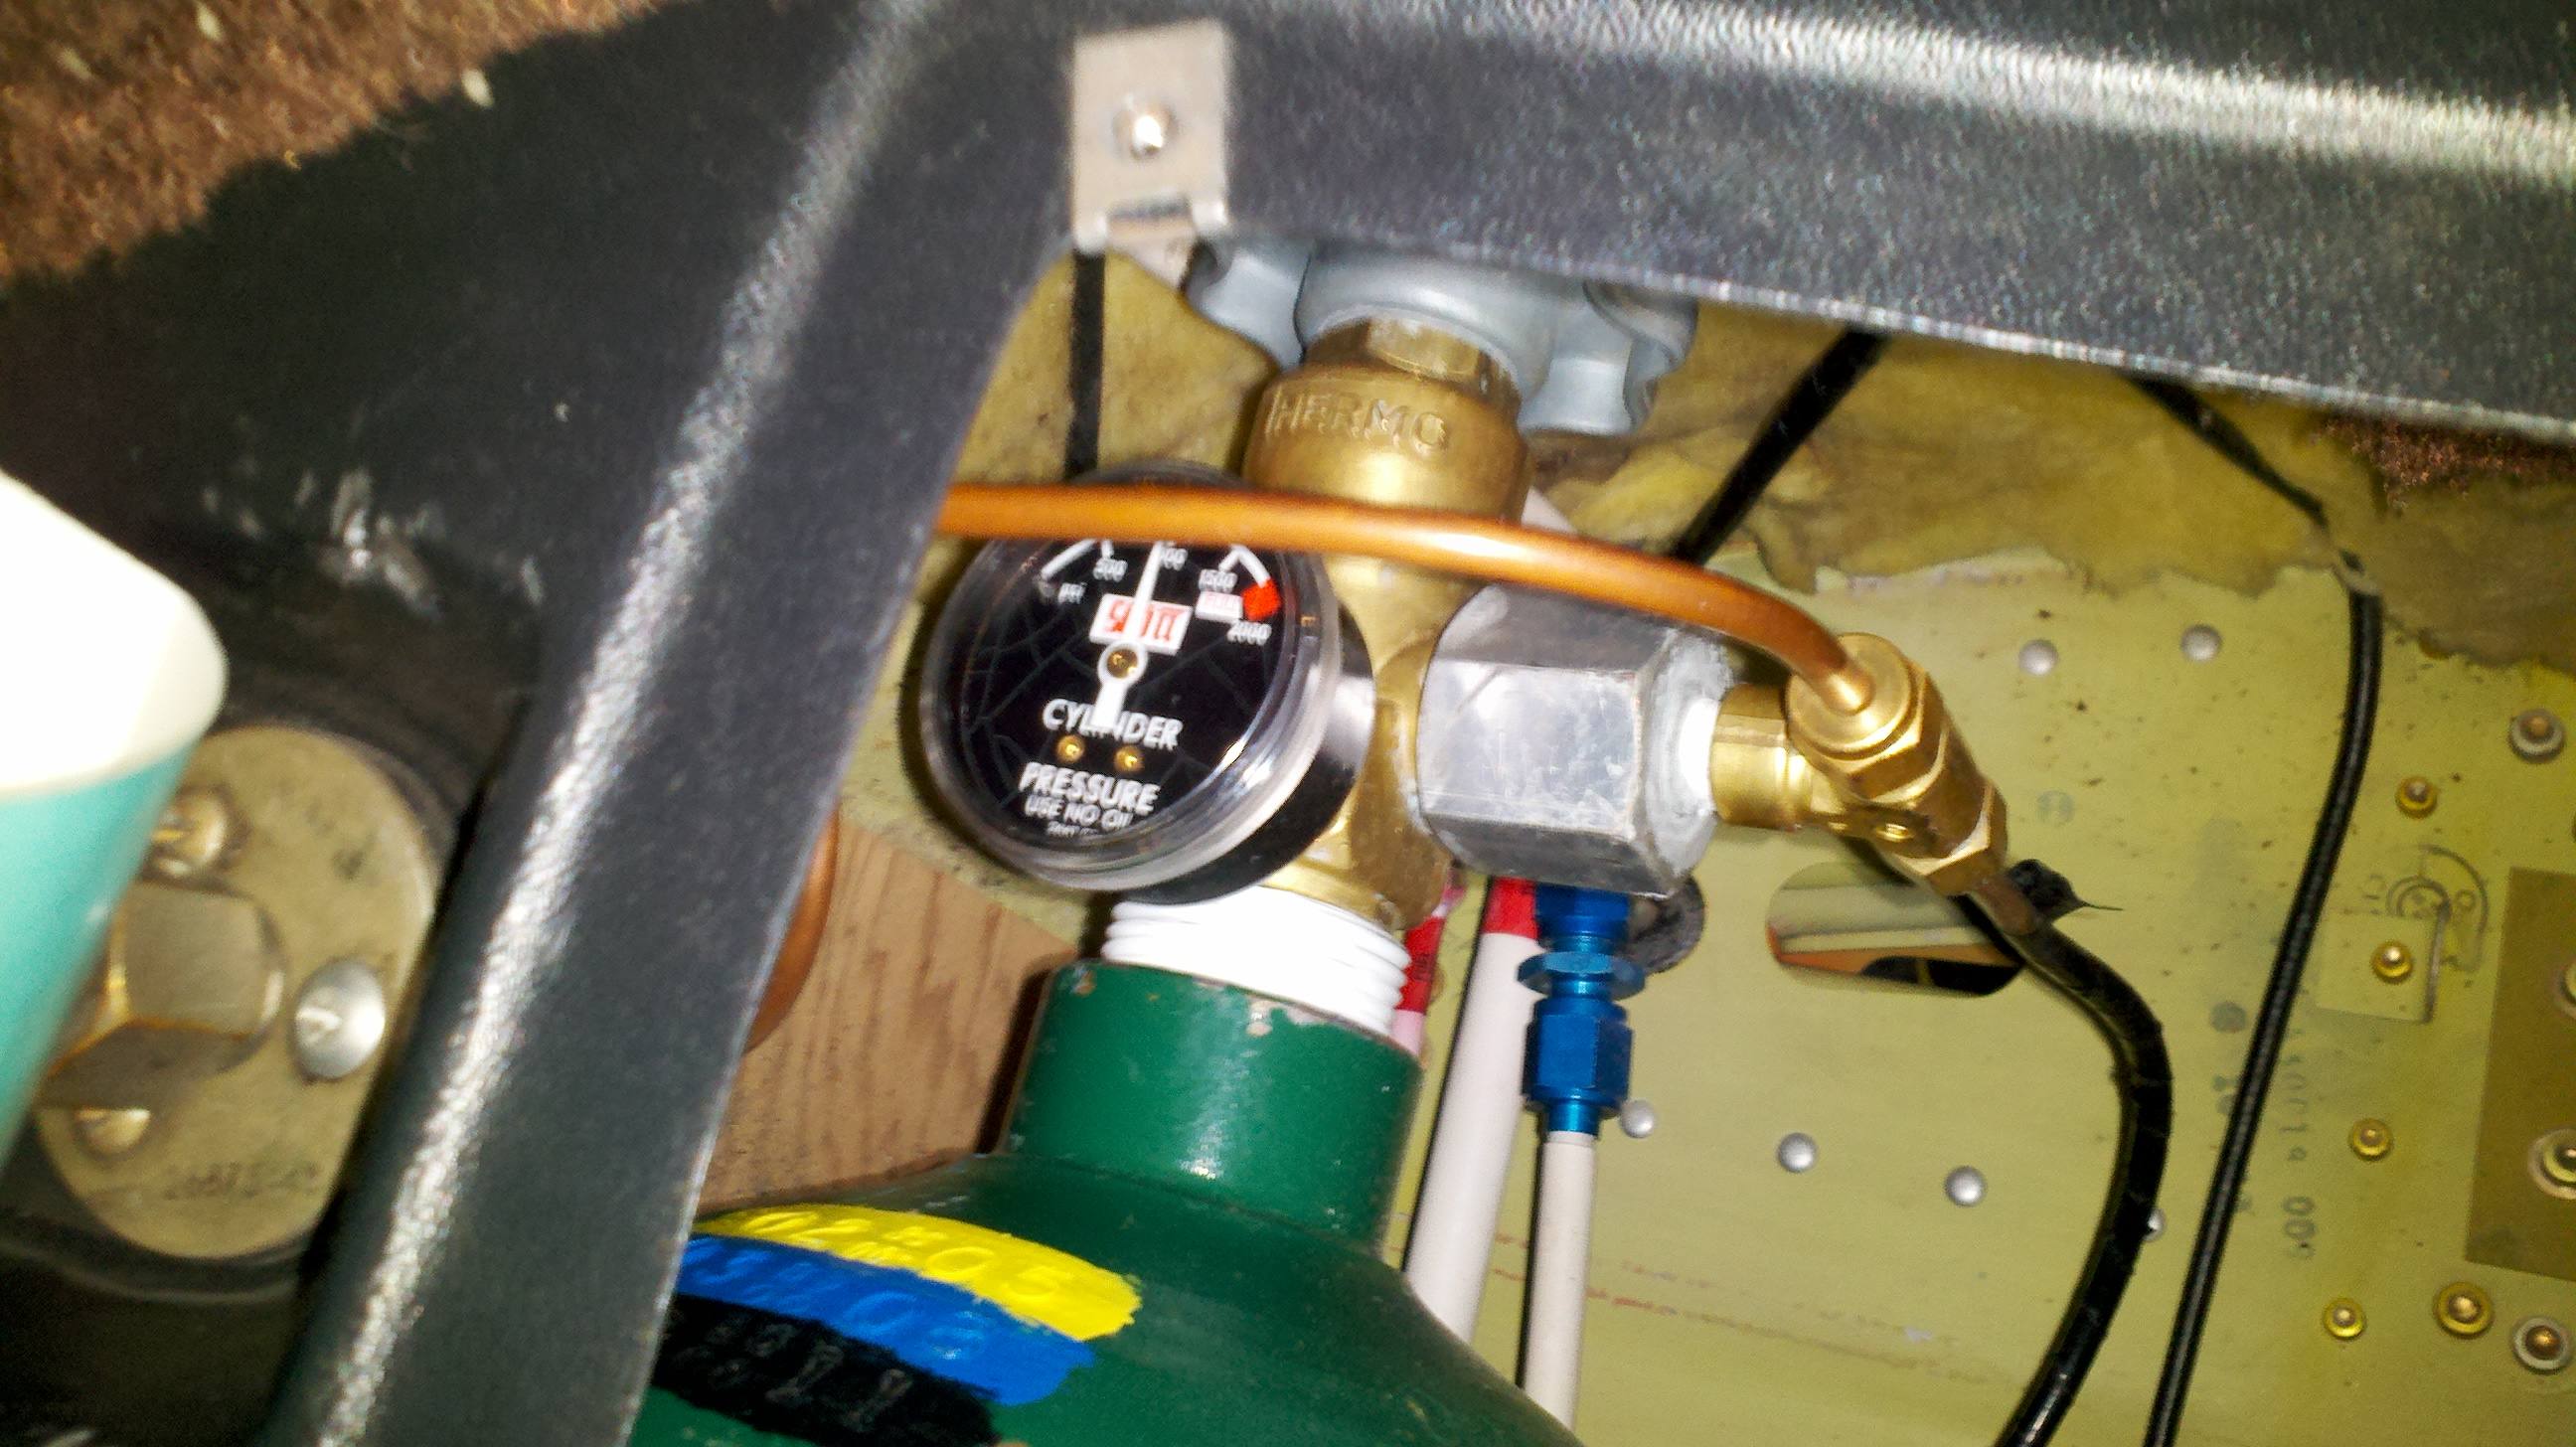
On the left is the mounted control panel with the factory copper line
connected. For now, we have capped off the plumbing to the downstream ports.
Two-place oxygen will be just fine for now, we can expand to four-place when
the need arises.
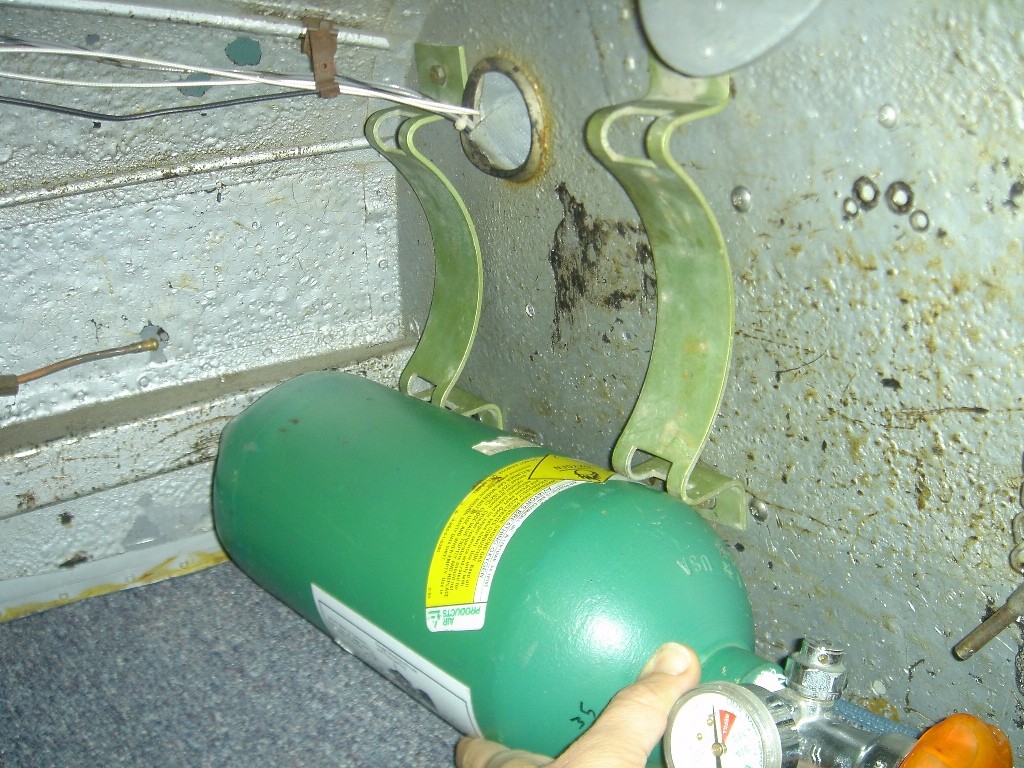
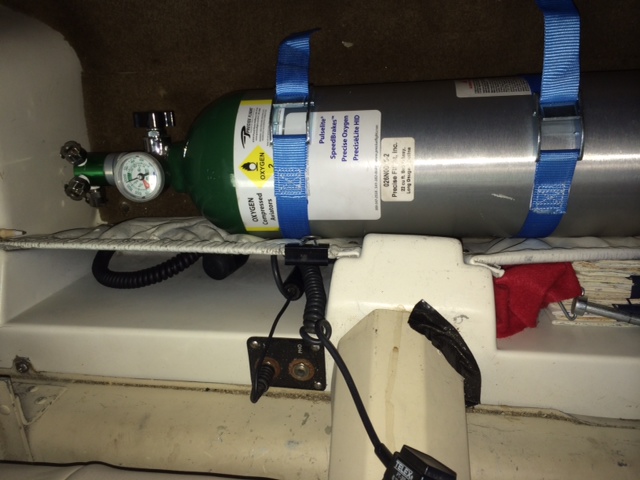
On the right is the nose baggage cylinder mounting brackets.
The fit in the front of the nose will be just fine for my oxygen bottle. Note
the chafe protection where the braided stainless comes close to airframe and/or
wires.
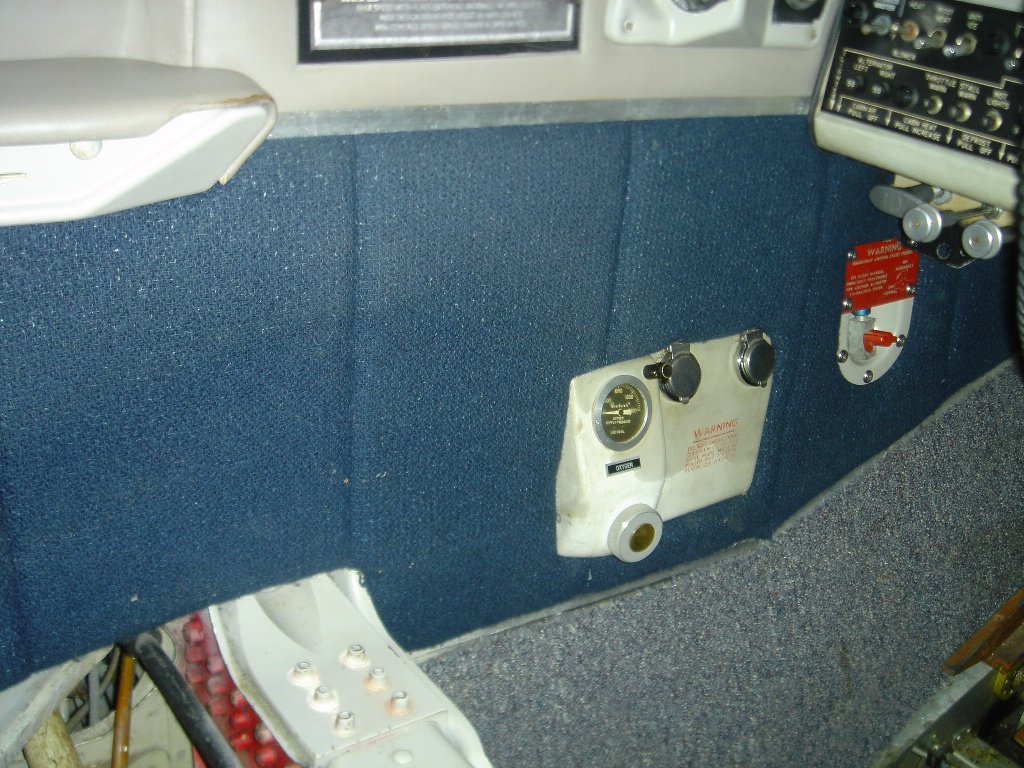
The finished control panel install nicely fitted to the
upholstery panel opening.
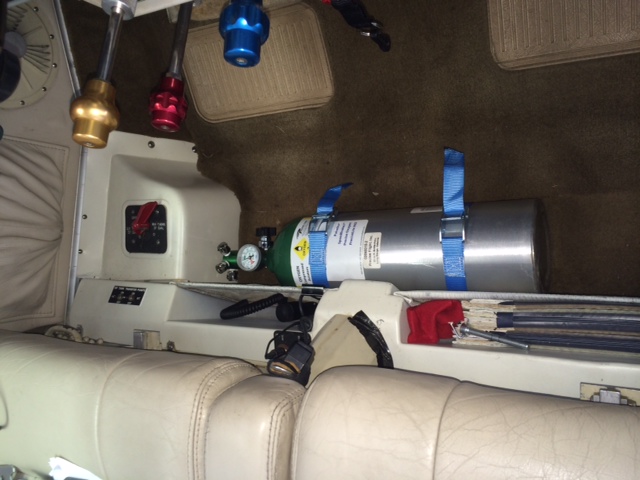
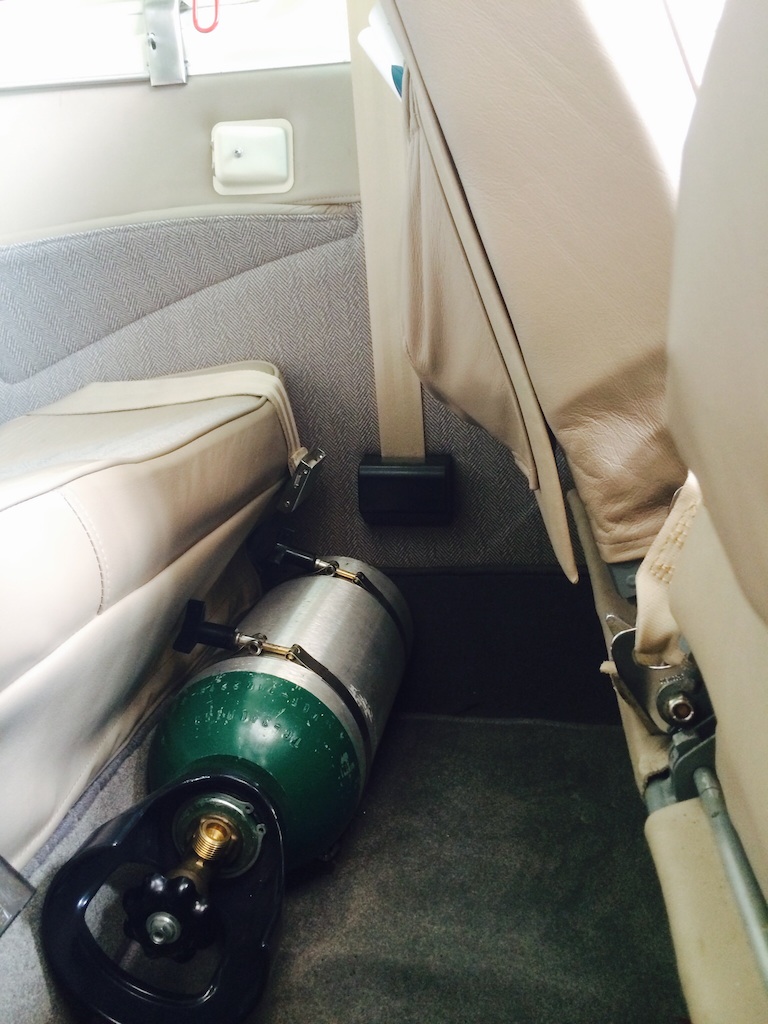
Here is a typical Bonanza O2 bottle mounting location - under
the seat.
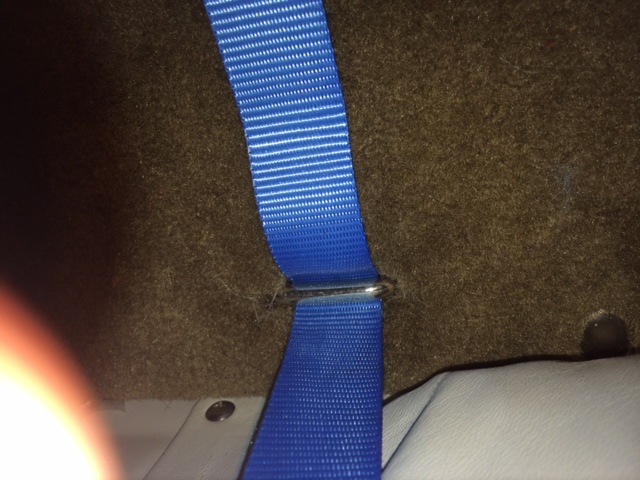
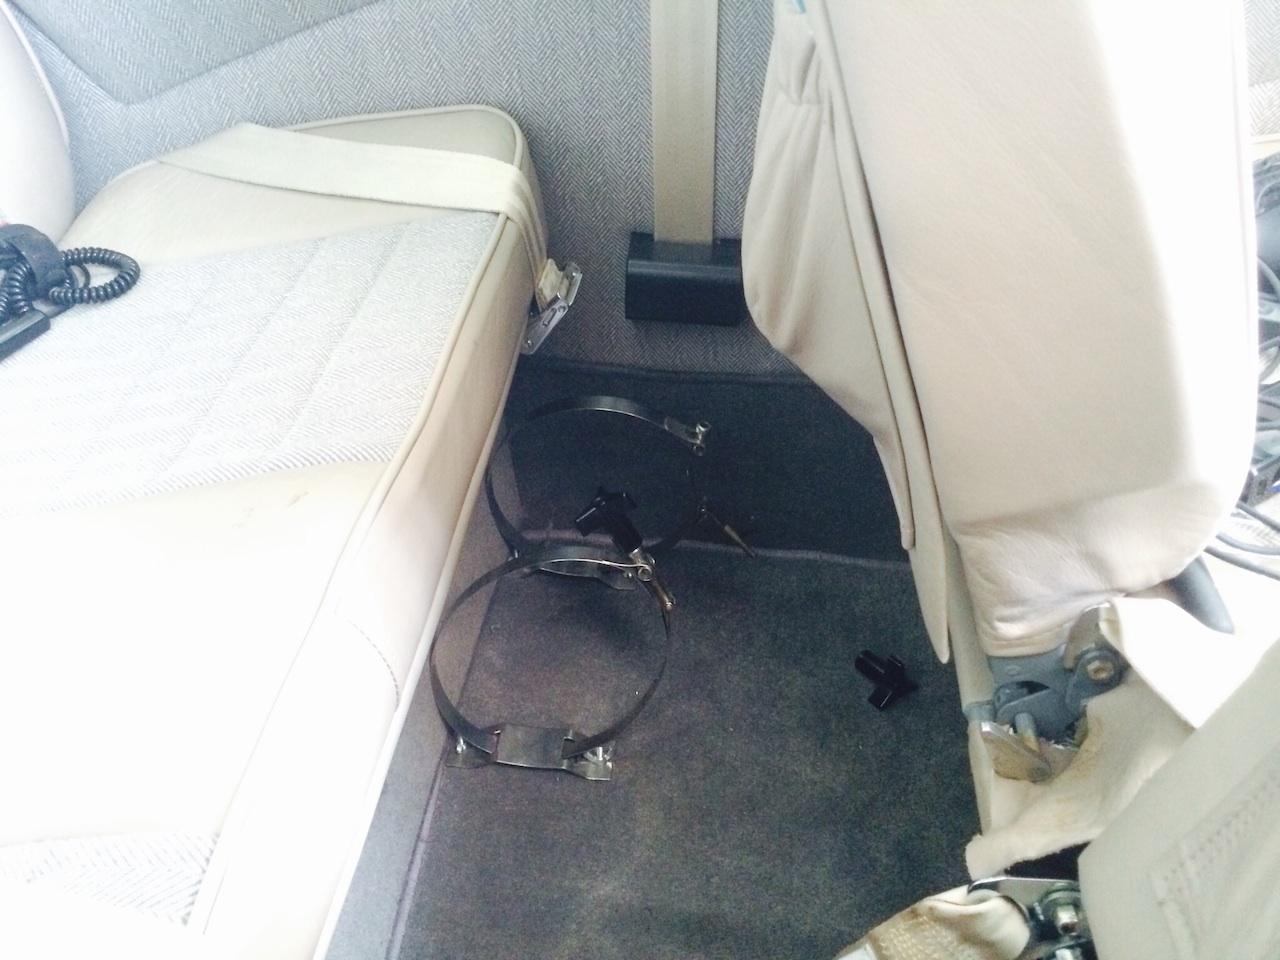
Here are pics of a Bonanza O2 Bottle mount solution
contributed by Tom Rosen. The brackets and straps hold the bottle tight against
the spar cover.
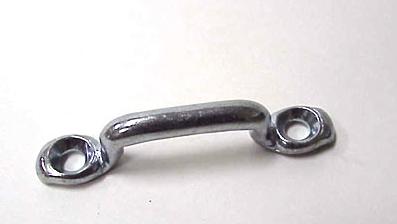
and here is the "Footman's Loop" used to anchor the straps to
the floor
Click the image above to source it for ~$1 each
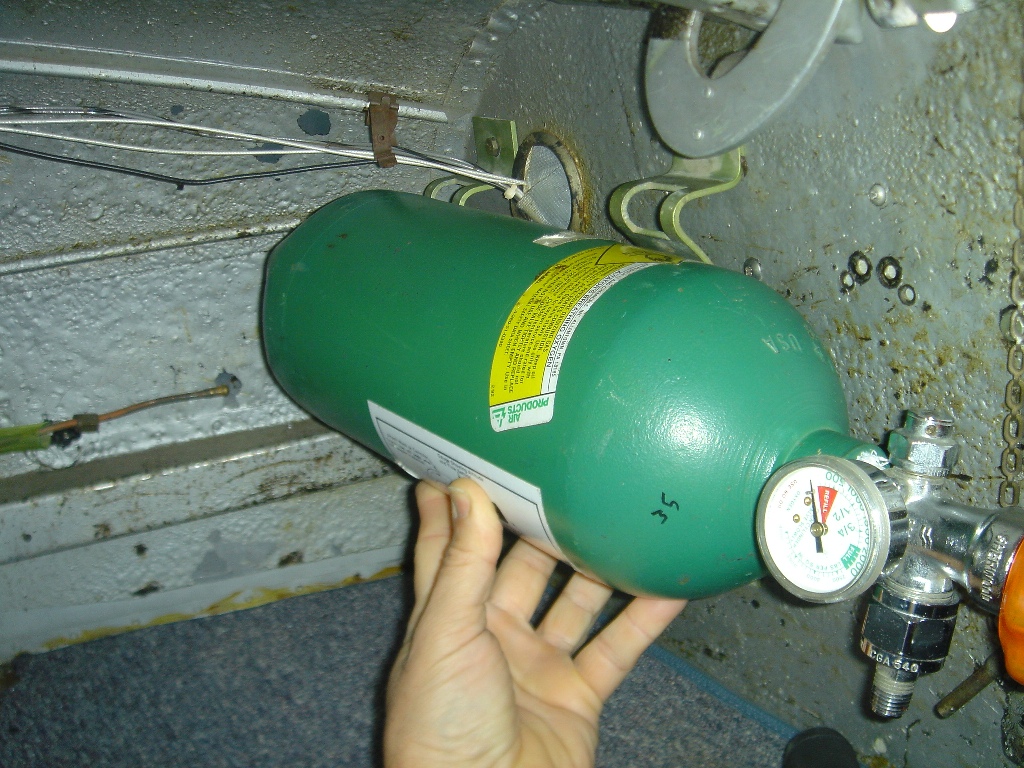
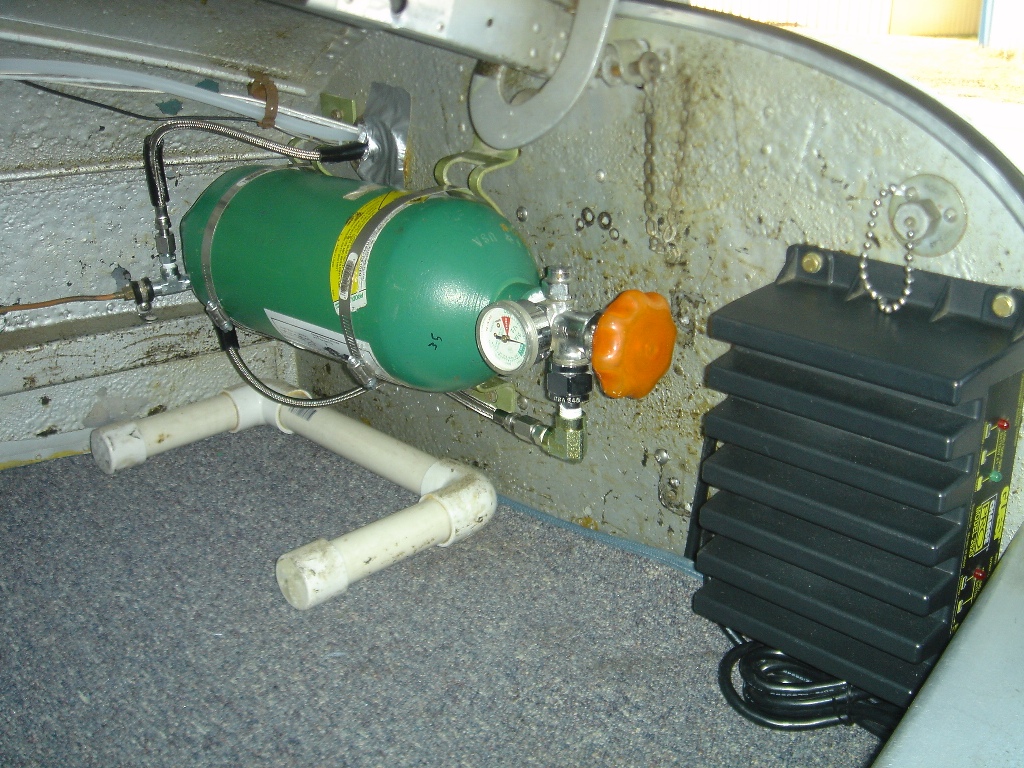
Here is another mounting location for a
portable O2 bottle to give relatively easy access to the cylinder valve and
route the hoses.
CAUTION!
Do NOT block access to
the manual gear crank handle!
In the process of using my small
9 cu ft/240 liter oxygen tank, I learned that the factory system of most
aircraft is set up to deliver about 2.5Liters/minute of O2. So you can see how
little time I have with my 240 Liter bottle.
After a little more research I
found that AEROX offers a great line of oxygen accessories and systems.
They have a
"retrofit kit"
which plugs into the Beechcraft factory "Scott" oxygen ports that has an
adjustable flow valve, calibrated flow meter and an
Oxysaver cannula.
This will allow me to tailor my
O2 flow to what I need (as opposed to blasting me with an overly high flow) to
keep me in the +90% O2 Saturation and get me possibly up to 5X the amount of
time on my bottle.
Lloyd at AEROX was even able to
fix me up with the adapter for the Scott fill port used on the Beech factory
system so that I can connect to my hangar filling station.