Does your Beechcraft Bonanza, Baron or Travel
Air upper door latch pop open or require you to tug on the upper part of the
door frame to get the latch hook to capture the pin in the airframe?
Well, after 5 years of increasing top latch
door pops culminating in two aborted takeoffs (one on the roll and one just
after liftoff) and after finally thinking I've gotten the door latched, the
upper door latch pops upon upon reaching 10,000' in the deep freeze of winter
traveling south from
KATW, Appleton,
WI, I had enough!
Don't ask me and my dog how we like open door
flying in the winter! Fortunately, we had just installed and
refurbished the nose heater and the OATs were
only about -5C, it was manageable.
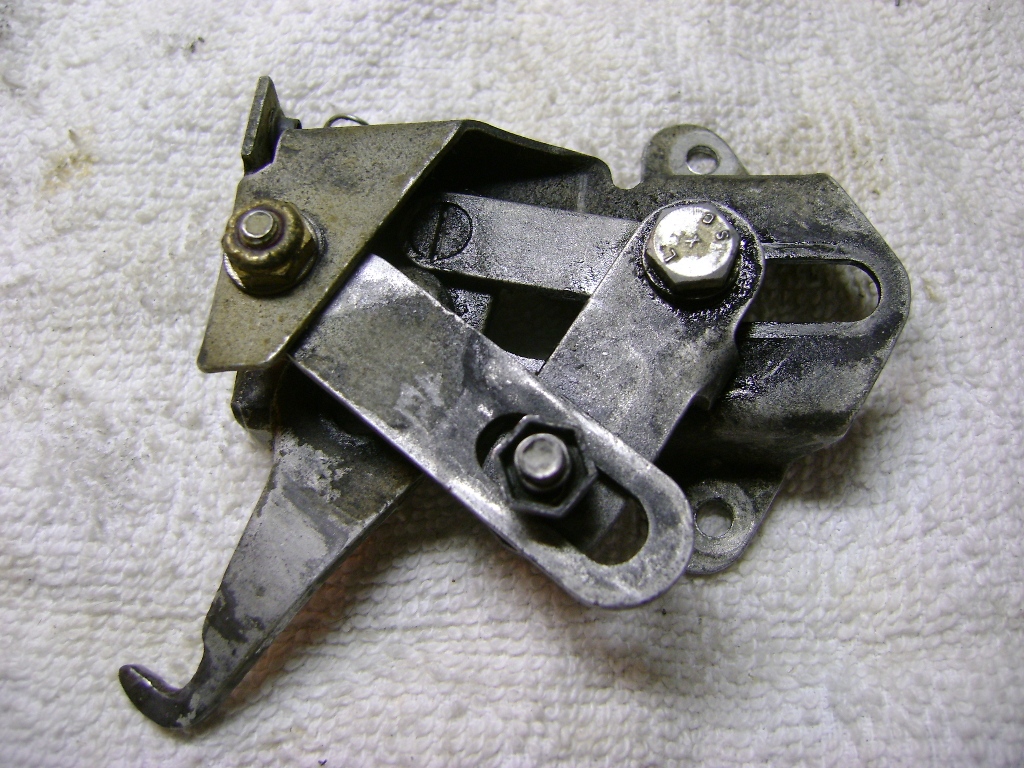
met me in my hangar that evening and we extracted the offending
latch (see pic above). Without a functioning latch to compare we were stumped as
to what was the problem.
Initially we thought the bushing slop in the
mechanism was the issue and set out to source some bushing material. No bushings
were listed in the Beech IPC and nothing suitable locally could be found, so I
put a panic call into the Beech Parts and Door guru, Kevin O.
Kevin quickly returned my call and said he had
a salvageable low time door including the upper latch assembly, that I could
come to Oklahoma to pick up. OK, so next call is to my buddy Al D., based at
52F, to see if
he can fly me up there in his sweet K35 Bonanza.
Al then tells me that our mutual Beech Lister buddy Bob B.
(formerly of Corona, CA and now living at
Bourland Field -
right in my Texas backyard) has some upper door latches. It just so happened
that Bob was going to be at the same
SWBS Xmas Party
the next day. So I found Bob at the party and made arrangements to pick up the spiffy serviceable Beech door latch
on Sunday morning and was with my IA, Dave, that afternoon to make the swap.
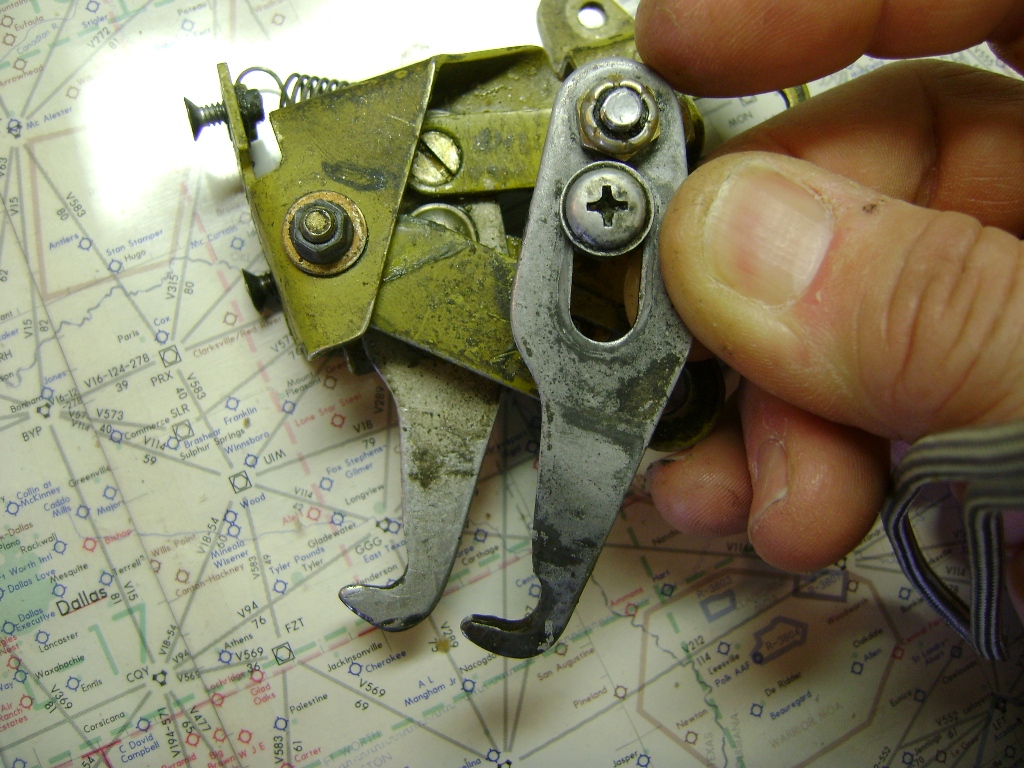
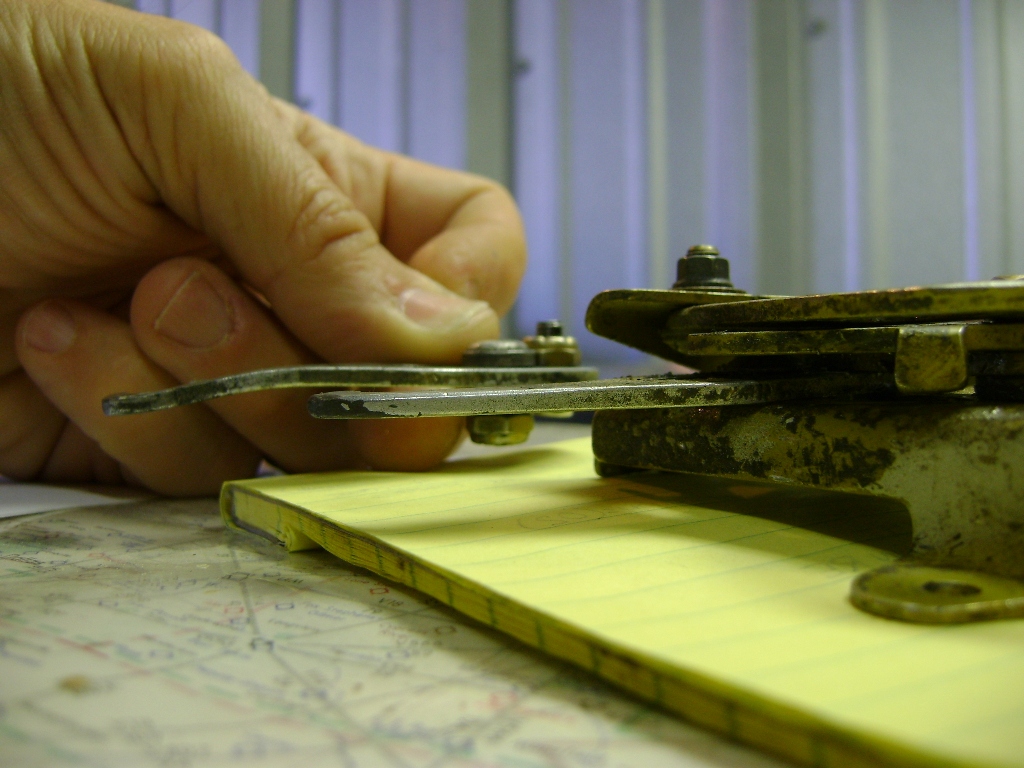
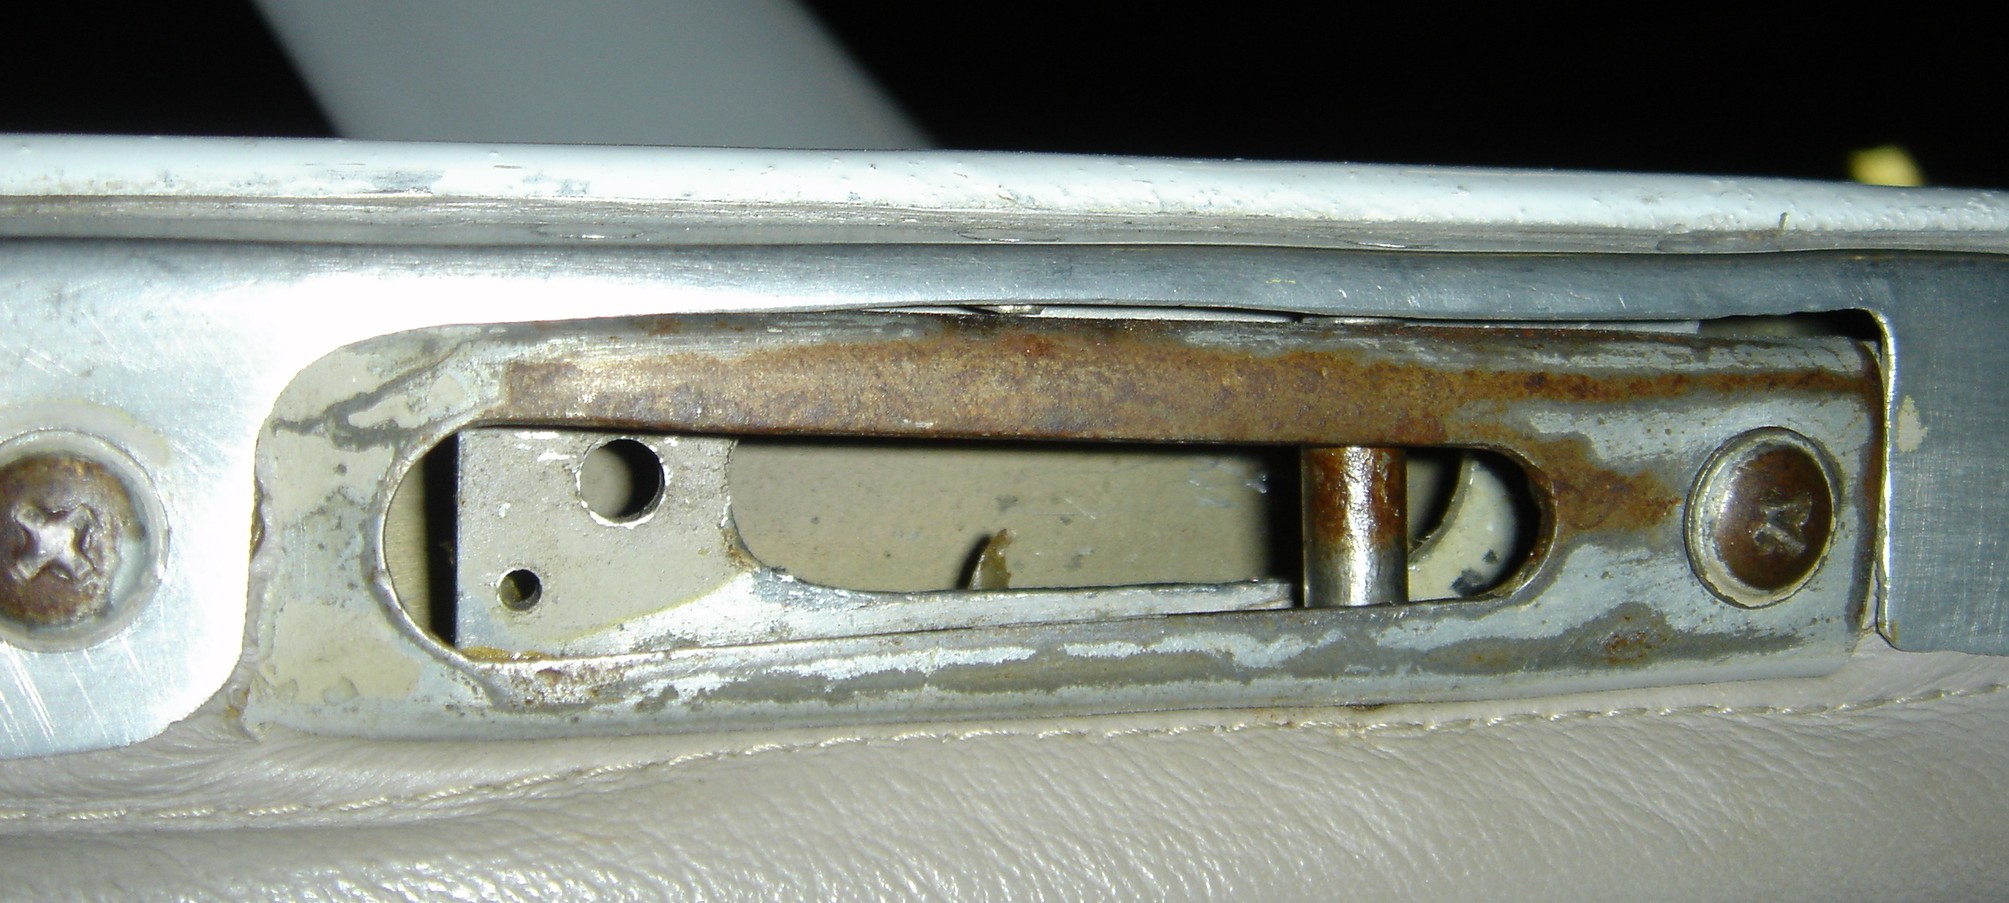
Notice the huge
amount of wear in the "hook" on the right.
Notice the severely bent hook arm. This is pretty FUBAR!
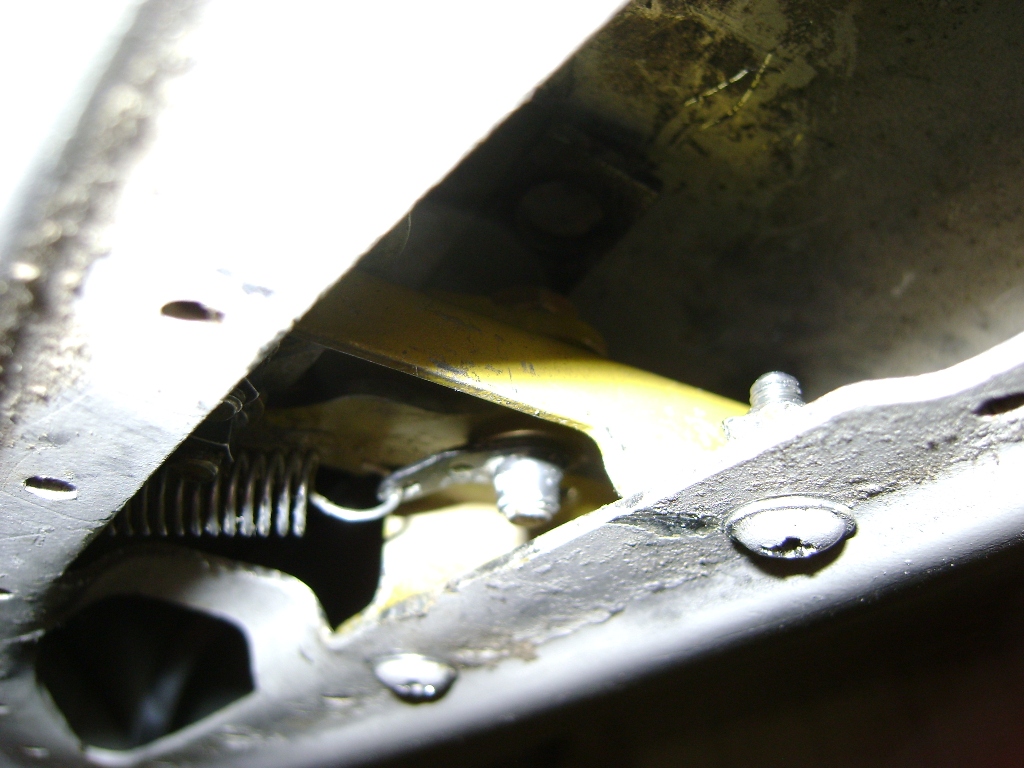
Upper Door Latch mounting zone from underneath
Upper Door Latch mounting looking aft
A couple of screws in the front of the latch
and two in the bottom rear of the latch, hold the assembly into the door frame.
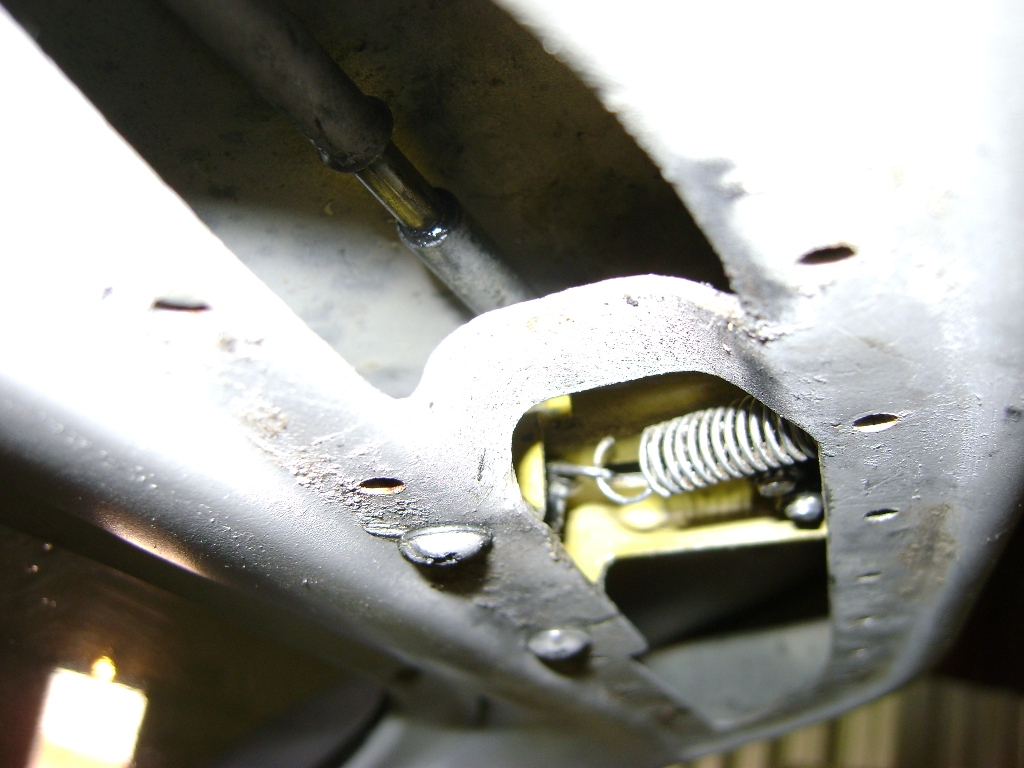
Removing the push-pull cable nut on top is
tedious but doable with a little magnet and small ignition wrenches.
Bolt through latch arms connects to push-pull tube, nut
attaches on top.
After replacing the latch, we are thrilled to
see that the latch does not pop open with hand pressure on the top of the door
from the inside. However, after the initial side latch closure (just prior to
turning the inner door handle to activate and secure the top latch) we still
have a fairly large gap at the top of the door to the airframe that requires a
pulling of the top of the door toward the airframe to have the hook "capture"
the pin in the top of the airframe.
Upper airframe door latch pin. Note by zooming, it has four
positions (fore and aft) it can be placed in, to custom tailor hook capture.
The pin can also be moved inward and outward for adjustment
via a screw in the forward end (right side of pic) of the latch.
Hmmmmm, Dave and I scratch our heads on this
for a while and we agree that something must be amiss in the side latch
mechanism. We poke around in there and remember that a while back we were
looking at the door for possible door handle spring replacement and found a pin
laying in the bottom of the door. It was about 2" long and maybe 0.125" in
diameter with a hole drilled in one end of it.
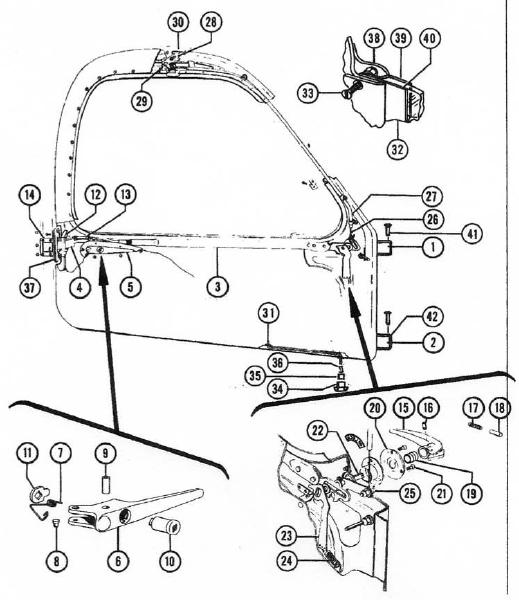
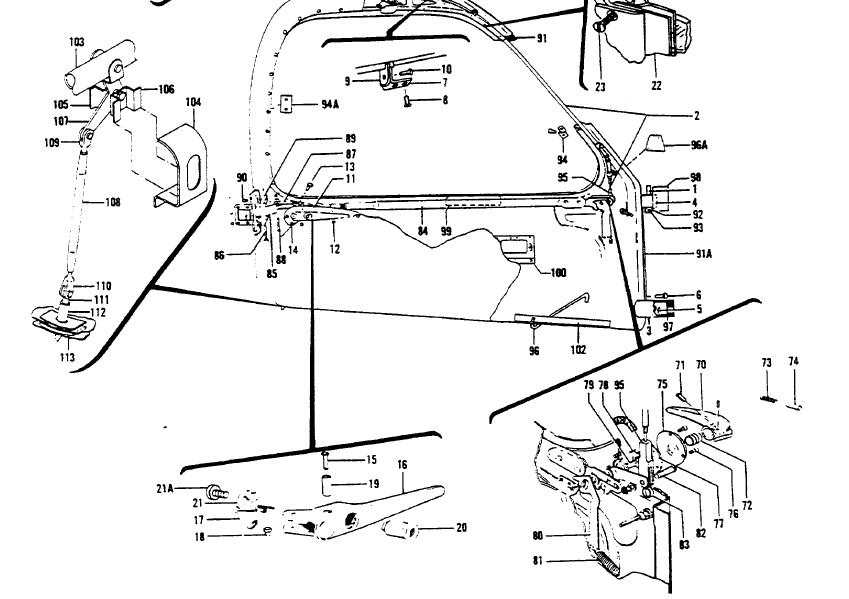
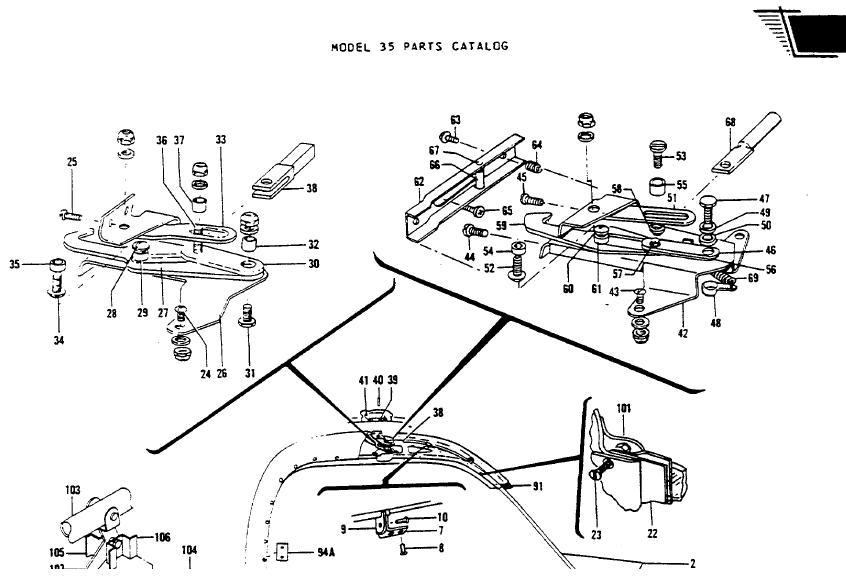
This was indeed the missing link (pun
intended). This pin fits up inside area #4 of the below diagram. What this pin
does is secures the whole side sliding latch mechanism in the door frame at a
particular point further away from the airframe. By doing this, the side door
latch catches in the door frame CLOSER to the airframe, thereby reducing the gap
in the upper part of the door. Make sense?
Well, after reinserting that pin (another
tedious ship in a bottle exercise, but Dave got super lucky with a magnet and
mirror), the door can be initially closed with a quick snap (not a SLAM), then
the interior handle is turned counterclockwise for a completely unassisted top
latch hook capture and a securely latched door!
WAHOO!
For printing convenience a PDF of this entire
page is HERE
(courtesy of Dave R.)
Here are additional door parts diagrams from
a 35 Bonanza Series (caution - may be similar to Baron, check your IPC to be
sure):
Here are some additional comments from Bob regarding the door
latch mechanism:
There are a couple of rollers/spacers/bushings and the latch plate hook that
can be replaced. They all seem to be terminal as in Mike's case at the same
time. Best to get complete latch from junkyard. Main cause is misalignment from
slamming door with latch already closed, excessive force to close latch and lack
of lubrication.
Virtually all door problems initiated from interference of upholstery
especially on the forward edge and improper door seal installation. Also worn
hinges create a sagging door causing the latch to have to raise the door into
position when securing. A child should be able to close the door.
Once the components, latch hinges seals door have been compromised most
efforts at improvement seem to make matters worse.
NOTE: This discussion only
applies to Beechcraft upper door latches that have the hook facing forward. An
older Beechcraft airframe (possibly prior to 1960, don't quote me just check
your airframe) has a larger hook design in which the hook faces aft!
A BIG thanks to Kevin, Al, Dave and Bob who all
pitched in to help me out of this jam so I could make my Xmas trip!
Check out some door adjustment secrets in this
article
HERE by Dennis Wolter of AirMod
Check out the Door Lock Cylinder replacement
narrative HERE
If you've found this content useful, even though you're a card-carrying
CSOB, please consider a
secure PayPal donation by clicking the "Donate" button to defray some
of my expenses.