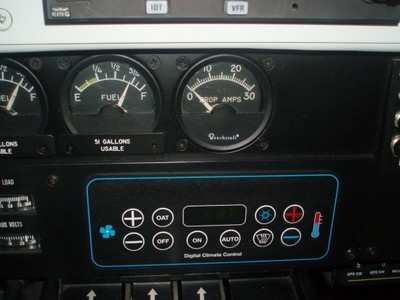
This
narrative was written and contributed to CSOBeech.com by F33A Bonanza
owner, Brian Manke, regarding his experiences and the solutions he
developed to make his FTA AC system function more "pleasantly".
This narrative is long overdue based on some of the comments I have read over
the past several months. I have also had several of you reach out to me
looking for help and it's obvious that this information needs to be
published. I know when I started down this journey I could not find any
documentation. I hope this information helps several of you and saves
you a lot of time so you don't have to go through what I went through to
get our system working correctly.
It's
also important to understand our system was installed in 2011. A lot
has happened since then and who knows what happened to our plane before
we owned it.
I
bought our plane about 3 years ago and back in 2011 FTA installed their
air conditioning system. My wife’s family lives in Boston and mine in
Chicago so our plane does some cold weather flying. Our first trip into
cold weather was a bone chilling event and we FROZE. I wasn't happy and
the wife was MOST displeased! I knew this wasn’t correct and thus began a
three year odyssey to correct the many, many problems with our climate
control system.
Heat Related Items
1.Co-pilot vent not screwed to air frame.This
is that big round vent that is mounted to the side of the air frame and
is a fresh air vent from the leading edge of the wing. Ours was only
screwed to the carpeting. Not a single screw between the valve and the
air frame. HUGE air leak!
2.Rear Bulkhead vent deformed & obstructed.This
is the 4” or so round hole at the top of your rear bulkhead that should
be connected to the exhaust port on the back left had side of your
plane just behind the back window. This helps the air flow throughout
the cabin when you are using the heat. Mine was deformed and obstructed.
3.Heater mixing valve cable not secured to valve.
Simple as this must sound, the cable must be securely attached to the
mixing valve below the battery in the engine compartment. The bushing
had been lost on mine and the cable was wrapped around the arm. The
system will modulate the valve on mild days. It can only modulate the
heat if it has a direct connection to the valve.
4.Heater mixing travel maladjusted.
Again simple sounding but the system has to be able to turn it ALL the
way on or ALL the way off to work properly. Mine was not. The cable was
incorrectly attached to the servo and was not getting enough travel to
fully open or close the valve.
5.Heater flap seals.
Inside the heater valve are rubber flaps that seal the valve. If yours
are original or damaged this will naturally significantly affect your
heats performance. Gee Bee Aerospace has the flap seals.
6.Servo arm frozen.
There are two servos inside the cabin below the main cabin door. One
moves the heat mixing valve in the cabin, the other the defroster valve
on the firewall above the copilot rudders. The servos have an arm with a
ball tie rod on the end. One of mine was frozen solid. Instead of
moving the cable, it would bend the cable. It’s amazing the cable didn’t
break. Periodically these should be inspected and lubricated.
7.Rear heat servo not secured.There
is a valve inside the passenger compartment just in front of the
copilots pedals that controls the air flow to the back seat passengers.
There is a black servo just above it. Our servo was not attached to
firewall and therefore could not actuate the valve.
8.Temperature Sensor Air Flow.
Does your system not seem to know what the cabin temperature is? Do you
need to turn it way up or way down to get it to react? When I was on
the home stretch this was one of my final problems. I could not figure
out why I needed to sometimes crank the heat either way up or way down
to unreasonable temperatures to get it to react the way it should. This
was especially noticeable on mild days. Behind the pilots seat is the
temperature sensor in a little black plastic housing with a stainless
steel screen on the front. Behind the screen is a fan to draw the air in
from the cockpit. After drawing the air in, the air needs to go OUT.
There should be holes on the bottom of the housing to exhaust the air
and ensure a continuous flow of air across the temperature sensor to get
a reasonably accurate cabin temperature. Our housing did not have any
holes. So the air inside the housing was trapped. Words cannot describe
how much better the system works with holes for the air to exit the
housing after passing across the temperature sensor.
While
you are there, carefully check the connections of the four little
wires. One of mine was poorly done, fell apart as I was putting the
interior back together. When did I discover the problem? AFTER I had the
entire interior reinstalled and could not figure why the fan would not
work. Back apart again. You don’t want that to happen to you. If your
wiring is bad, the connector is available from Digi-Key. Instead of
trying to crimp those tiny connectors, they sell pre-made leads. MUCH
easier to work with.
1.Check the wiring over closely. a.
Definitely check the primary feed to the system at the circuit
breakers. Mine was being fed with a single 18 gauge wire that was poorly
tapped into the primary supply cable for the entire cabin electrical
system. There is now a proper copper bus bar connecting the row of
circuit breakers with an appropriate sized wire that is connected to the
main power feed with a ring terminal and not a ring terminal cut into a
spade terminal. When I had my EL panel redone, I added labeling for the
previously unlabeled circuit breakers plus the ones I added as part of
our COVID big G upgrade. b.
My tail section was a mess. Wires everywhere. Poorly secured. Poorly
routed. Did not affect system performance but it looked terrible. c.
If your head unit is mounted to the pedestal – check the wiring behind
the control unit. The elevator cables are RIGHT behind it. There is not a
lot of extra room. In addition the weight moves up and down in this
area. My AC wiring was hitting the elevator control cable and weight. It
was not easy to find a solution to ensure they are out of the way.
2.Front Round Black Vent Fix.Do
your black vents rotate and point wherever they want? This is easily
correctable. The round black plastic vents just snap into the duct.
Carefully pry them out. Once out you’ll see the two rows and molded in
pins where they pivot. Carefully pry it apart, and put a small nylon
washer on each end and reassemble. Requires a delicate touch, but once
reassembled the vent won’t move on its own.
3.Other air leaks.It’s
amazing what other people will do to make their lives easier….. I found
the main landing gear boots on our plane had been ripped off and
discarded by the tip tank installer. Another huge air leak. Original,
dry rotted and shot window seals. Pilot vent window seals. Door seal.
All of these leaks significantly decrease the heaters performance. Gee
Bee Aerospace offers excellent silicone replacement seals.
4.Duct work.My
ducts were in ok shape but were definitely not ideal. The middle row
vent was collapsing. It can be reformed by carefully heating it back up
with a heat gun. Do not go to hot! And this requires a delicate touch.
Once you get it back to where it should be – fabricate an aluminum
support ring to put inside so it holds its shape when it gets hot. For
missing pieces of plastic or reinforcement, JB Plastic Weld Putty is
amazing stuff for filling and supporting brittle ducts.https://www.amazon.com/J-B-Weld-8237-Pl ... g=btalk-20
5.Insulation.I
discovered much of my insulation had been ripped out over the years.
All of my ceiling insulation was missing. I insulated the plane with
SoundEx. Wow is it quiet now and the climate control system is more
effective.
The
system now operates as it should (and expected) and more or less you
just set it and forget it. With only one temperature sensor we make
minor adjustments (seasons, night vs day) but for the most part it works
almost as good as a modern car. Our heating system can now keep the
cabin comfortable (wearing either a long sleeve T or light sweatshirt)
down to zero degrees Fahrenheit at night. I am not sure how much better I
can get it so I would be interested to hear how effective other peoples
systems are.