|

Recently a Beech Lister and
fellow Baron owner had his plane in for some starter maintenance. When the shop
began to prime the engine to test the starter, fuel began to leak all over the
engine from his fuel flow transducer mounting configuration
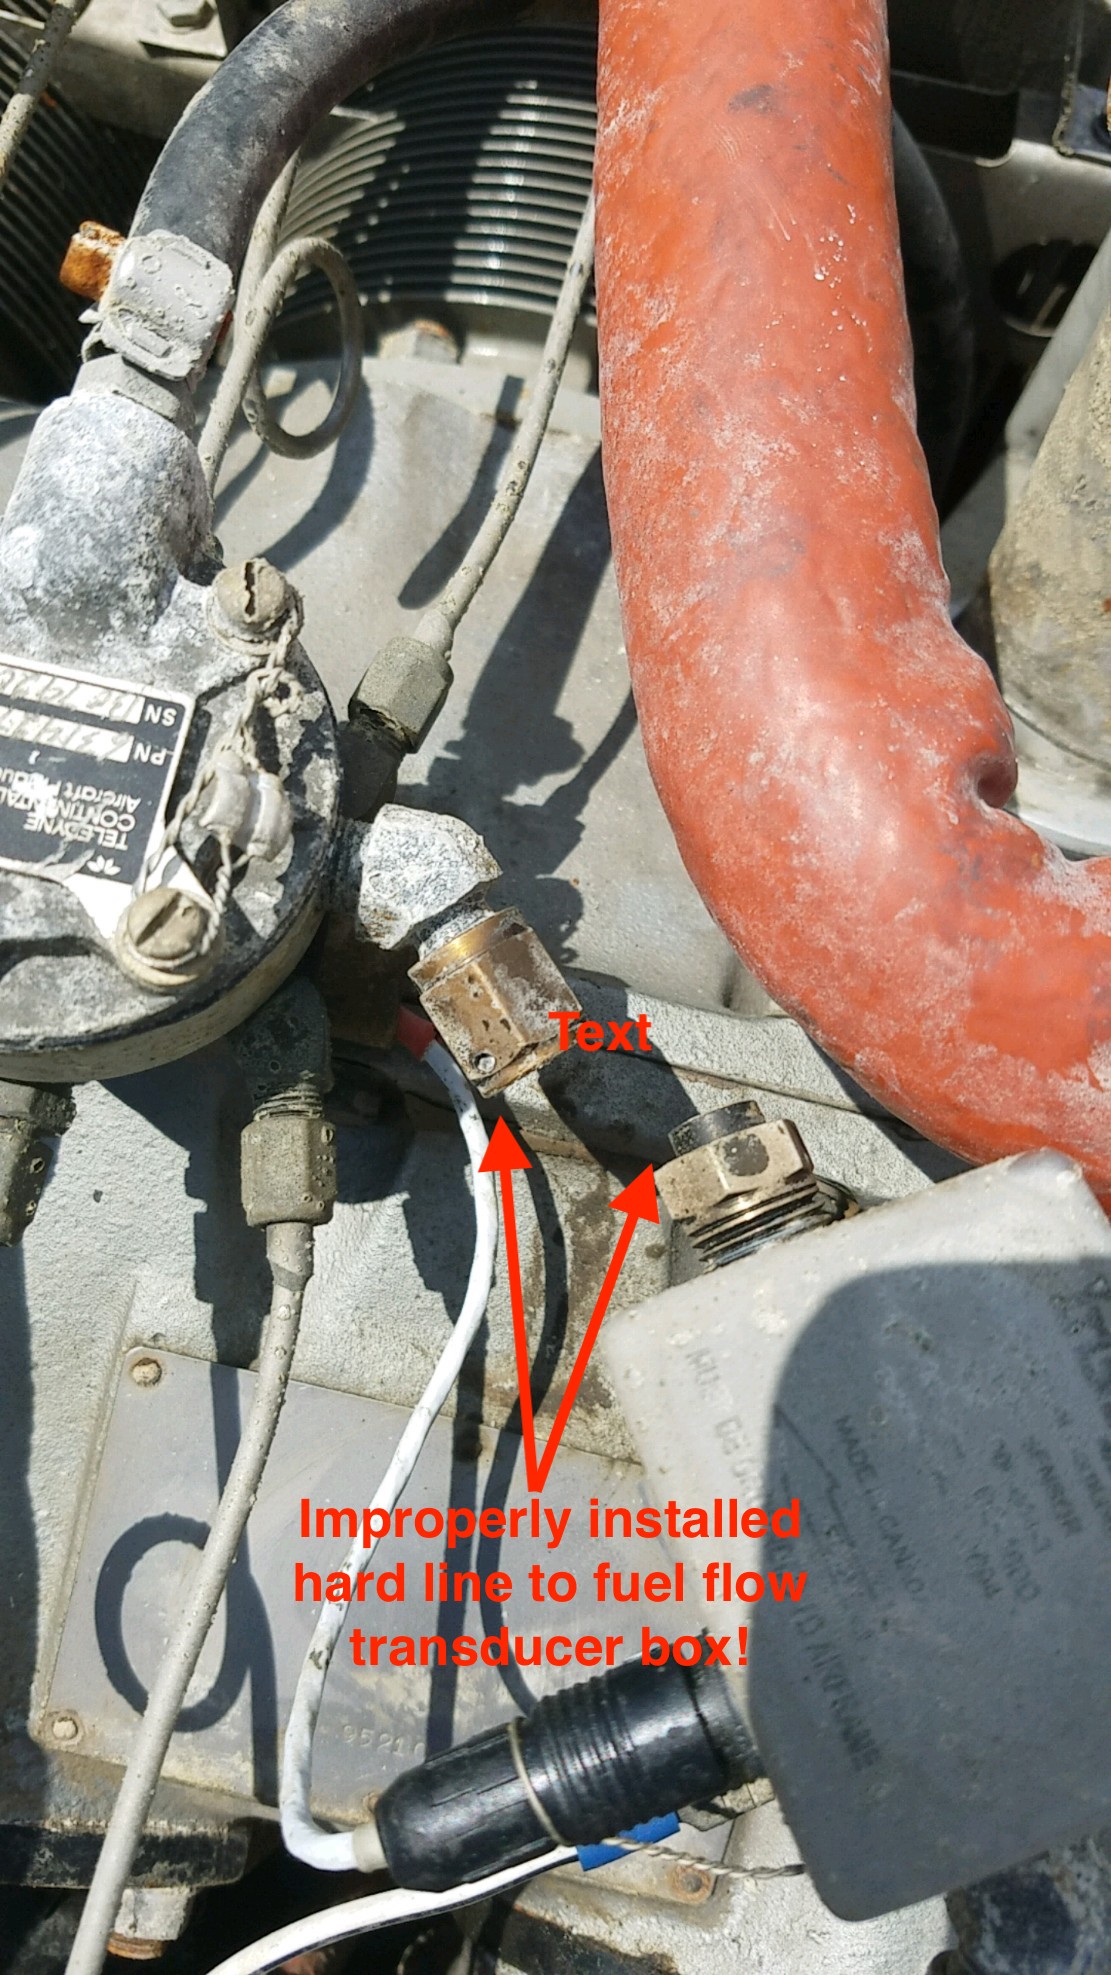
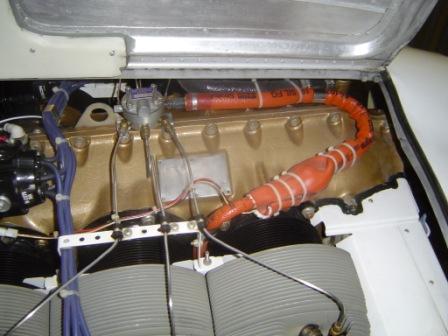
Here is what his
configuration looked like:

Can you see what's wrong with
this picture?
The leaks were the result of
the previous installer using hard lines for the transducer install! And aluminum
lines to BOOT!
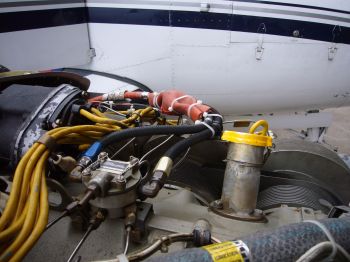
Here is yet ANOTHER disastrous transducer
install that resulted in an Bonanza engine failure in flight, over coastal
waters of the US.
Both JPI and EI have specific install
instructions to use flexible hose for this critical connection to the fuel
spider. There is way too much vibration going on up there on top of the engine
for any hard lines to survive. This owner was extremely thankful that the leak
did not happen in flight with his family on board. Very scary!!!!!
Check your Fuel Flow install to be sure your
installer read the instructions <nbg>!
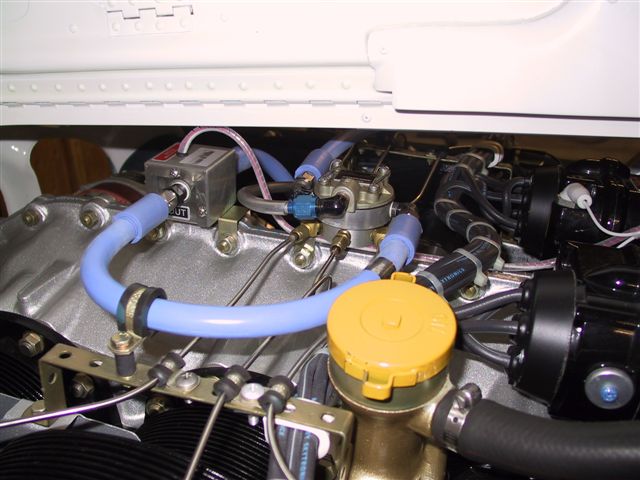
Here is his revised install, thanks to a
fortuitous find by the shop replacing his starter:
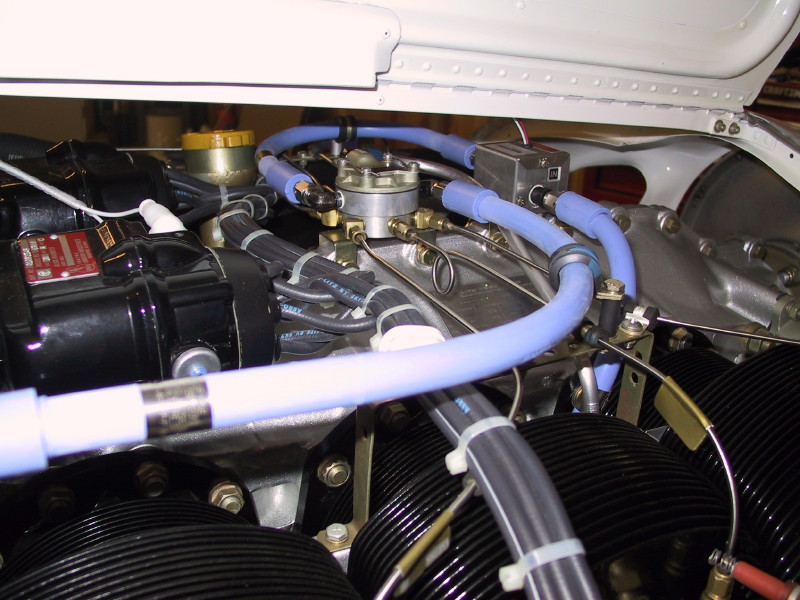
Here is another Beech Lister's transducer
install on a Bonanza:
Here is another fuel flow transducer install
on an IO-470N
So, if you have a digital aftermarket fuel
flow system installed, give your set up a look to be sure it uses flexible lines
over the engine and avoid a potentially very scary and dangerous situation.
Fuel Flow Transducer
Install WATCH OUT!
Many folks are installing digital fuel flow
instruments these days. They are awesome pieces of instrumentation and when
properly installed and calibrated can give us something on the order of 1%
accuracy of our fuel consumption and when connected to a GPS signal give us fuel
remaining at destination instantaneously!
Here is an install watch out that has been
identified by Dan M. with sleuthing help from Mike Busch. The Beech Talk thread
is
HERE and Dan's narrative follows:
|
The fittings differed
internally, and were reversed - very likely when the
Shadin was installed 12 years ago. The plane has burned
through 5 cylinders since then. Takeoff power was reduced
when at low elevation airports (not good for clearing
trees). The only reason the engine did not destroy itself
was it's low compression ratio (7:1).
Reversed the fittings, reset the metered pressure back one
turn to undo prior test, and started it up. Full power,
full rich, fuel flow went to 21.5 gph with the factory
pressure gauge right at the SL takeoff mark.
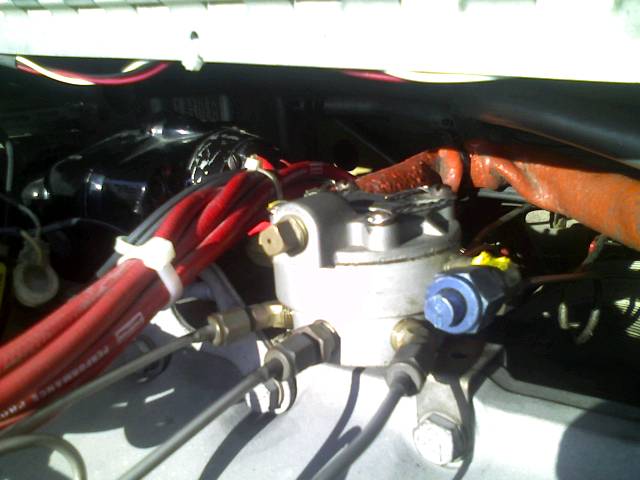
I have attached a photo of the fuel manifold. Notice the
capped restricted elbow fitting (I applied yellow torque
seal for future identification). The normal elbow fitting
is behind, pointing away, and connected to the
fire-sleeved fuel hose in the background. The brass plug
near the top with the tiny hole is the vent for the
diaphram.
|
|
|
|
So before "Joe Mechanic" starts hooking up your
transducer line to the fuel manifold, you might want to be sure you and he know what's coming out
or NOT COMING OUT of that fitting!
The fitting on the spider manifold with a
"restrictor" orifice are usually used to provide the pressure reading to the
factory fuel flow (or pressure readings converted to FF gallons/hour) gauge
inside the cabin, therefore, you do not want a full pressure spray of gas inside
the cabin if the hose cracks. Others have commented these fittings SOMETIMES can
be found painted red.
The problems seem to arise when the restrictor
fitting is inadvertently or mistakenly placed on the supply side!
Here is a bulletin on it:
Continental: IO470K; Improper fuel fittings; ATA 7324 A technician states, "(We
performed...) the fuel injection setup per TCM SID 97-3E, but the electronic
fuel flow computer showed flow below specifications. We were unable to increase
flow sufficiently by increasing pressure. (Subsequent inspection revealed
the...) inlet elbow fittings (P/N's 631658 and 628437) had been previously
reversed, probably twelve years prior during installation of an electronic fuel
flow transducer. Part
631658 has a restrictor orifice, while 628437 does not. The parts look
identical externally. It takes a very careful (observation) to see the internal
difference. The TCM engine overhaul manual does not mention this.
The TCM parts manual shows the different part numbers, but does not describe
the differences. This would be a very easy mistake to make, and very difficult
to diagnose later. (Again), this problem probably started twelve years ago, and
was not detected or corrected until now. This airplane had five cylinders
changes during this time - (most likely) caused by lean operation at full power.
The aircraft (may not have...) generated full power on takeoff due to a very
lean, full rich mixture. It is critical to communicate this to mechanics and
owners to prevent a dangerous condition."
PS: Good Call on installing a FF
instrument and hooking it to your GPS! Takes a lot of the old school estimation
out of "Wonder if I have enough fuel to make it?"
Here is a narrative by Beech owner
Mike T. regarding his search for fittings for his fuel flow transducer install:
I finally found a source of the steel fittings I need to install FloScan
transducers on a pair of TCM engines.
I wasn't having success with suppliers of aviation-type hardware but checking
with suppliers of hydraulic fittings got quick results.
What I need are 1/8 - 1/4 male-male NPT FF pipe nipples, SAE 104137. They
cost less than $2 each. Parker is one mfg.
These particular fittings might not be appropriate for any individual engine.
It depends what fitting is on the flow divider, which may or may not conform to
the TCM parts catalog. (Going down the aviation road got scary as one potential
vendor got an "expert" involved who mentioned the necessity of meeting
"aerospace standards" and such.)
Hydraulic supply houses might be a good source for other types of fittings we
use. Some sell a big variety of AN fittings, for instance, dwarfing the
selection offered by popular aviation vendors. (A couple of years ago I paid an
aviation house almost $30 for a brass elbow fitting that's readily available in
the real world for $2.05.)
Certainly, it's up to the installing mechanic to determine suitability.
|


