|

Man, I sure hope I do not have to ever do this door cable job!
But, like any
aviation crisis, remain calm and "Fly the Airplane" and digest these tips on
this PITA job from TJ, who had this happen to him in his "experimental" Travel
Air.
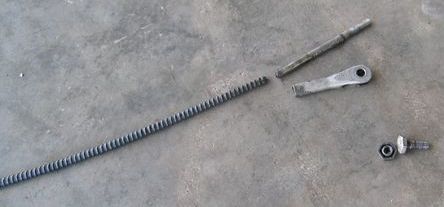
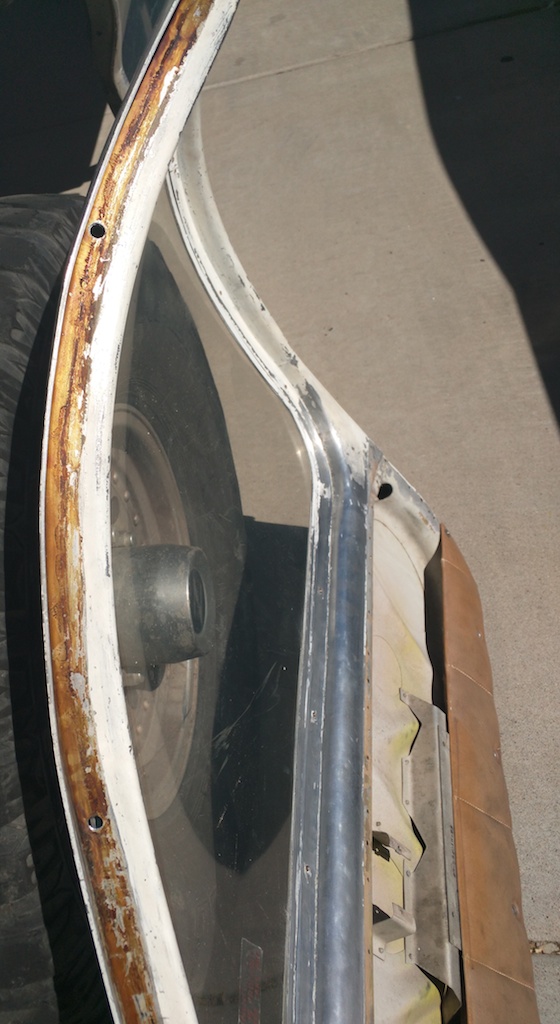
It starts out looking like this:
OK, take a deep breath and
send the wife or girlfriend to the spa for the entire day or weekend and get
your mechanic's favorite beer loaded into the cooler in the hangar! Here goes:
1) Remove upper and lower door upholstery panels.
2) Remove Spring from cabin door latch (going to replace
it anyways). Ace Hardware has nice springs since you are just experimenting.
3) Remove screw and 3/8 nut from the door right above
that spring that acts as a limit stop to the latch. Makes getting in there a
lot easier.
4) Remove nut and screw from the bottom cable clevis at
the latch. A nice collection of long angled "forceps" are helpful. Also take a
few 3/8" open end wrenches, grind down the sides to make them real thin. Take
one wrench and bend it about 1" up from the tip at a 30 degree angle to help
get around the corner. A real skinny "offset" wrench will be very helpful.
Perhaps put these wrenches in a bag for later use.......Don't worry if the
parts fall down in the door, a magnet will help.
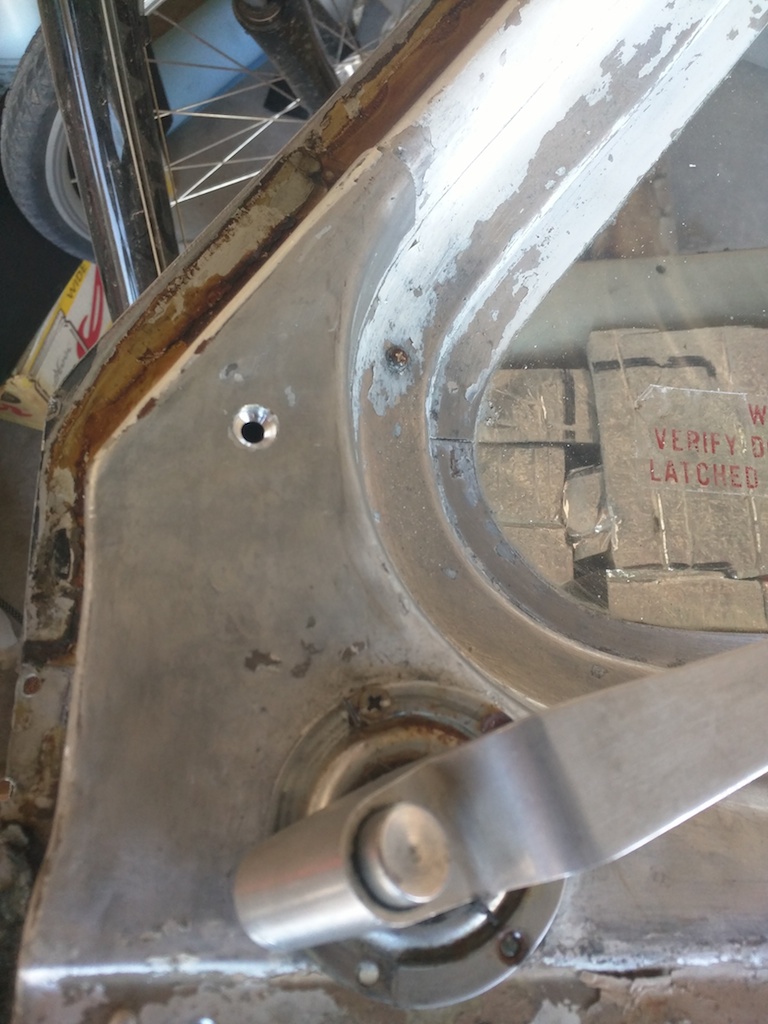
5) Use the same wrenches to remove the upper clevis nut
from the top latch. Observe how all that "action" works up there, and put it
back together the same way. There is a bushing up in there that will try to
escape. The clevis up there is different from the one at the bottom.
6) Pull out the old broken cable, observe the
approximate positions of the clevis ends and save all the parts.
7) Remove the old cable housing. It has 2 or 3 screws
under the door seal. They have nuts on the back and you can't get to them most
likely. Drill out the heads of the screws, the nuts will fall away and the
housing will eventually seem free. Take a Vice-Grip at the upper end of the
housing and with a hammer start beating that sucker out. Turn, twist, bang,
bang till it is out. Get another one or two people to steady the door so you
don't tweak it. Got all the old cable out? Congratulations.
Since we are still just experimenting, ..
8) I might be tempted to call Dick's Speedo-Tach in
Phoenix (Shawn: 602-279-6463) and order the following part: 174-vtt-1-36.5
($75). A 314-vtt-1-36.5 would work too, and would have lower operating
friction. Take this new cable and you will see at each end of the housing
there are some big nuts to remove and discard. The part of that housing where
those nuts were needs to be bent on one end to make the sharp turn at the
bottom. When you bend it it will crack, and you will have to have it welded
back to about a 20 or 30 degree angle. Clean up the weld real good. This newly
bent end will help make the sharp turn down at the bottom of the cable by the
latch.
UPDATE 3/8/2017: Pirep from Ryan H. indicates
that Dick's no longer has the equipment to make this cable. Ryan was able to get
a great solution from California
Push Pull, Inc. Ryan reports that they answered his inquiry right away and
provided him with a 314-vtt-1-36.5 for $79.89 including US shipping:
9) Ok, put the bottom clevis on the newly bent end of
the experimental housing.
10) Start feeding that sucker up the door track, until
it is out the top. Do whatever you have to do to get that nut and bolt back
into the lower clevis to attach the latch. Re-install the new spring and the
screw with the nut that acts as a stop. Now you are theoretically done with
the bottom.
11) I would use an Adel Clamp on a .5" standoff to hold
the upper end of that cable housing .. on my experimental. That would hold the
upper cable housing fixed for proper action. I also would have taken the old
stainless steel housing and cut off the upper 12 inches. Then I would cram
that old housing back down the channel next to the new housing with the
vice-grip and hammer, which will help to secure the new cable housing in
place. Hook up the upper clevis and start working the adjustment until you
have wonderful action.
Or, just buy the factory part and try to get the whole
mess in there on your own.
Old Door Cable Extracted
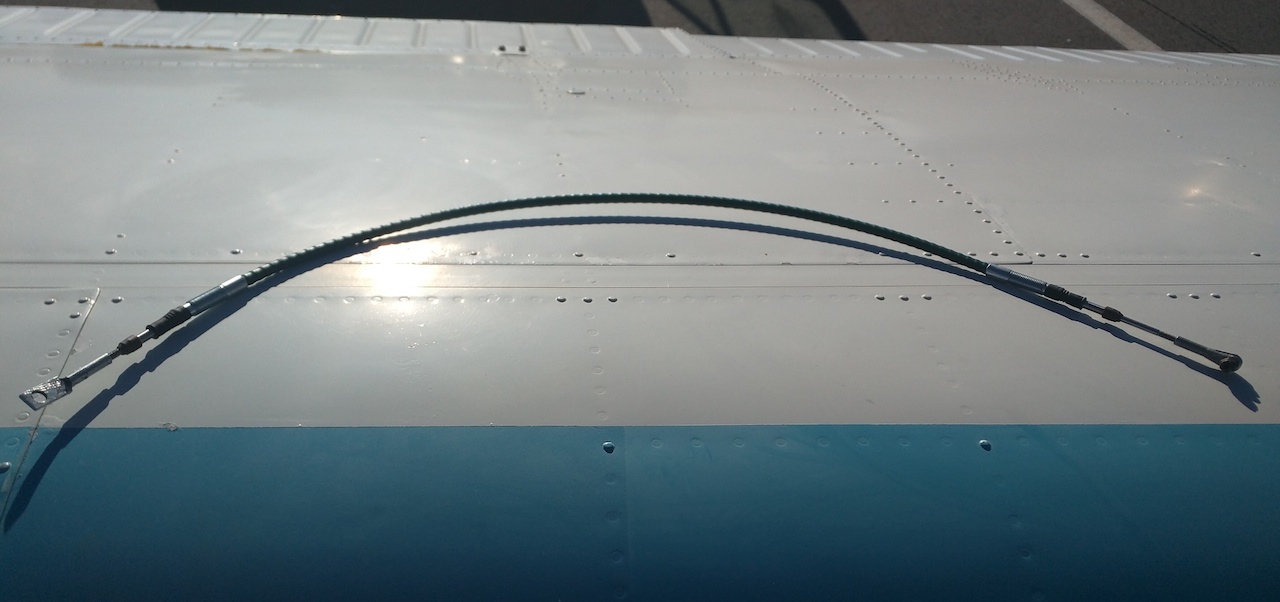
New Door Cable from
California Push Pull
Door Removed for Cable
Replacement Surgery
Door Rivet Removal
Here is Ron H.'s pirep on his
C35 Bonanza door cable replacement surgery
"I own a c35 so here are the locations of the 3 Philips head screws that need
to be drilled out. The one by the door handle on mine is in a different location
for 1960 and newer guys. But there are 3 not 2.
I took my door off the airplane to repair it. It was significantly easier
working on a bench with the door laid down and it was only 4 bolts and 8 screws
to take it off.
I also included a picture of the new cable. Its sitting on the wing in the
above picture. I didn't have to bend, break and weld mine. I don't know if
you can tell but the cable I received had joints on each end that allowed it to
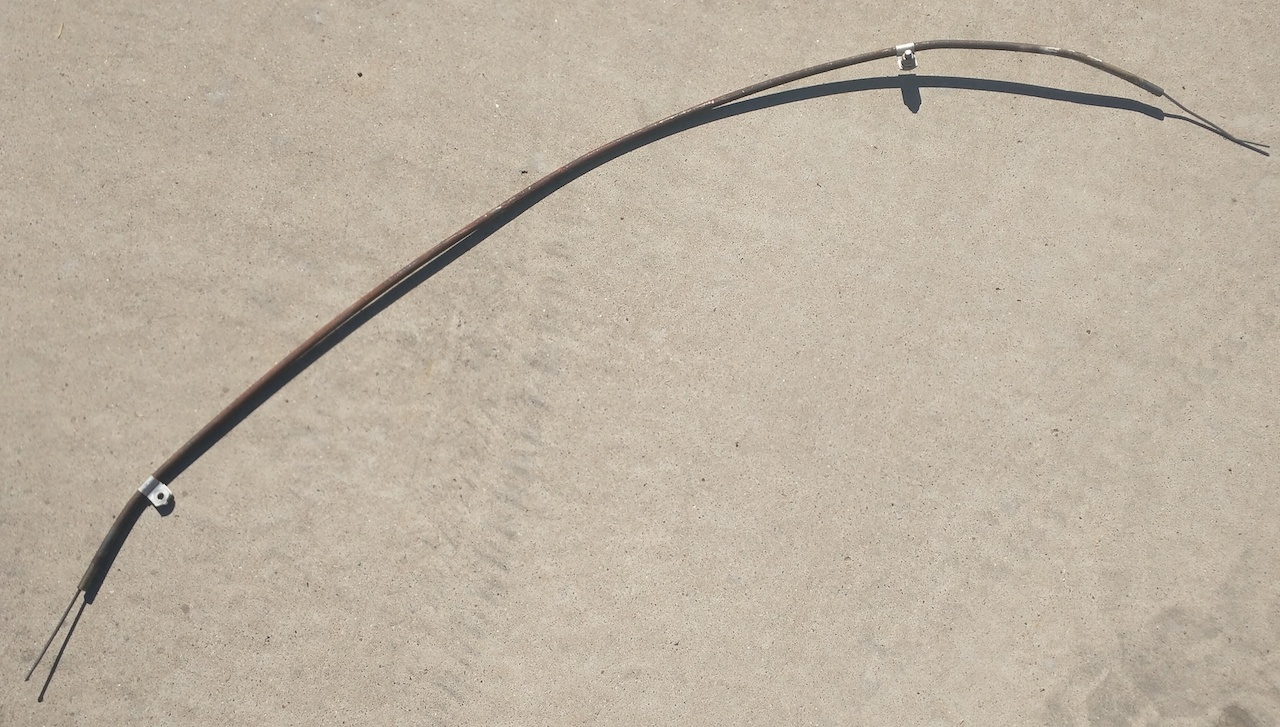
flex without breaking. I also included a picture of the cable that came out of
the door. It's sitting on concrete in the above picture."
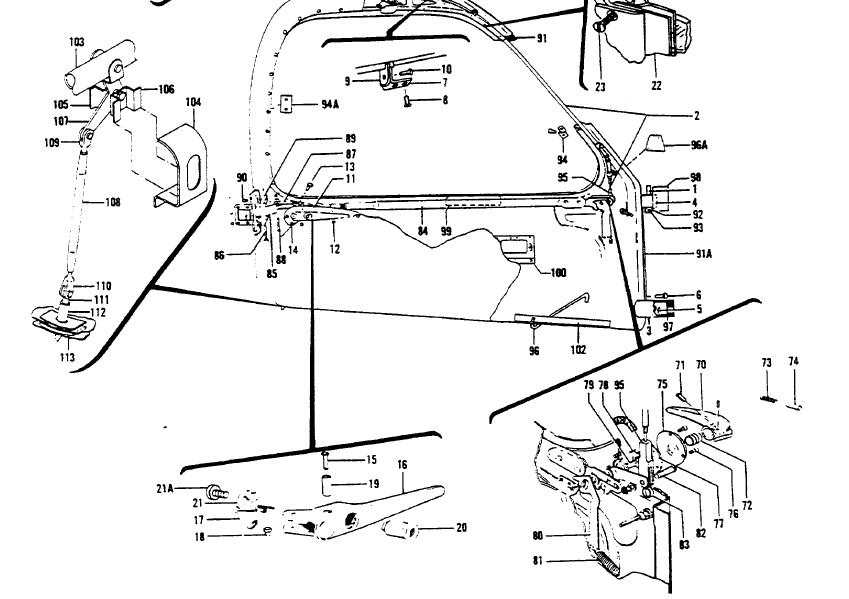
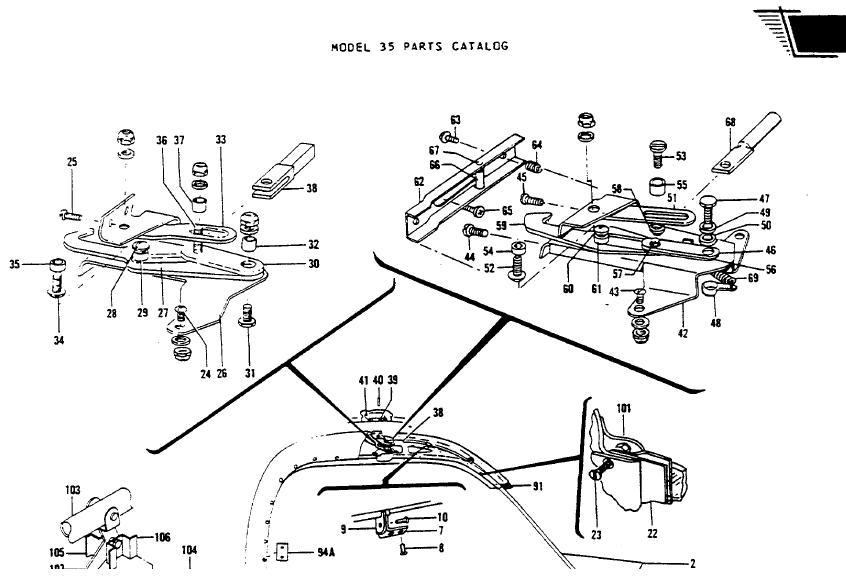
Here are additional door parts diagrams from
a 35 Bonanza Series (caution - may be similar to Baron, check your IPC to be
sure):
HERE is a
narrative on my own personal Upper Door Latch WAR!
Here is some Beechcraft door cable info
gleaned from Beech Lister John W.'s post in July 2009:
"Bob B. recently got a salvage door from Dr. Yankum and used
that door's cable as a replacement. One thing learned during this process is
that the early Bonanzas were designed such that rotating the door handle closed
caused a pull on the cable ... thus causing the upper latch to rotate its hook
over the pin within the door frame. That hook has a rather large gap between its
hinge point and the hook.
Fast forward to "newer" Bonanzas and the rotation of the door
handle causes the cable to push on the low end of the hook. In fact, the hook
rotates from a different direction and the gap within the hook is much smaller.
I can only guess as to why they switched from the cable pushing to it pulling
and the change in rotation direction of the upper hook. Bob B. thinks it may be
because the older iteration saw a number of cable breaks so they redesigned it?"
And there you have it. Now let
me know if you would rather change a fuel bladder than do this door cable on
your "experimental"!
Check out the Door Lock Cylinder replacement
narrative HERE
|


