|

Low Cost
New and NOS AN & MS
Hardware Source for your rod end replacement project and other aircraft projects:

Ask for Jerry at
Haire
Aviation 940-458-4603 or
E-mail

(209) 754-5175
A great source for hard to find hardware,
like steel NPT fittings and 100 degree oval head machine screws like NAS387 in
sizes 6 thru 10.
Read why you really need to use
AN and MS Spec Hardware
HERE
(Courtesy of Beech Lister
Bob B.)

Read why you need to banish
that automotive graphite lube from your hangar
HERE
(Courtesy of Beech Lister Bob B.)
Cleveland Recommends Dry Moly
Lube for Brake Caliper Pins

Need Funky Dzus Hardware?
Check these folks out:

Telephone: (352) 735 - 0065 Fax: (352) 735 - 0504
-
Convert any Bonanza Main
Cowling from the original Dzus® to MilSpec's
4000 series Heavy Duty C-Lock Fasteners.
-
Convert Early Bonanza Gill
Doors from the original Airloc® to MilSpec's
superior 2700 series C-Lock (Camloc®) Fasteners.
-
Convert Later Bonanza Gill
Doors from the original Airloc® to MilSpec's
Heavy Duty 4000 Series C-Lock (Camloc®) Fasteners
-
All Kits are Available in
Either Slotted Head (original) or Phillips Head.
-
Simple Installation, Main and
Lower can be Done in 4 Hours.


A-Locks & Pins Are Available Too
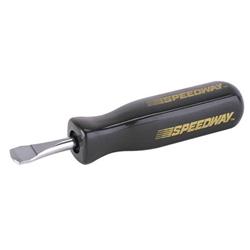
For those who have to have absolutely every special tool under the sun, this
one's for you!
Just kidding....it looks like a very nice tool and CSOB priced at $5.
Genuine Aircraft
Hardware Co.

Genuine Aircraft Hardware Kits Catalog
HERE
and Pricing
HERE


See their Beechcraft Bonanza Fastener
Conversion Kits
HERE
See their Beechcraft Cowling Replacement
Kits HERE
Here is Beech Lister, Mike T.'s account of
installing his Camlocs on his B55:
After doing a bit of shopping, I bought a cowl
kit from SkyBolt and tools from Aircraft Spruce. The tools: Camloc pliers and a
Camloc retaining-spring tool. I also opted for stainless studs and grommets, and
for Phillips heads.
I went with
SkyBolt because
Mil-Spec Products was flailing a bit (and SkyBolt was just the opposite).
Delivered, the kit cost $298; paid sales tax. Aircraft Spruce and others also
sell similar kits.
The four doors have a total of 40 Camlocs, but
the kit contains a total of 56 studs in 5 different lengths. You'll see why in a
moment. The kit also includes the necessary grommets and retaining-rings, also
with spares for each.
Installing them is straightforward. Take the door
of the aircraft, lay it on a non-scratchy surface, and use the pliers to remove
the old studs. It's easier if you lay the door butter-side-up on the table.
Although you're then removing the studs from "underneath" the door, each one
will be easier to grasp with the pliers.
Keep the old studs in order as you remove them,
so you know which went in which hole. Then remove the retaining springs from
each grommet. This was the only PITA of the job. The springs are like miniature
piston rings, and removing them requires digging them out of their grooves with
an awl or similar. I lightly cleaned up the holes with some medium Scotchbrite.
Then install new grommets. They slip right in the holes. Installing the
retaining rings to keep them in place is easy with the purpose-built tool.
Installing the studs comes next. It makes sense
to install a new stud that is the same length as the old. Although each Camloc
is stamped with its size (2, 3, 4, etc.), those numbers weren't legible on the
old studs.
So I simply stood the old stud on a steel plate,
stood a new one next to it and compared them. If they looked the same length, I
installed the new one. If not, I tried a different size. The special pliers made
installation pretty easy. The door then went back on the aircraft for a fit
check.
I have no idea how tight a Camloc should be. I
wanted these to be tight enough to be secure, but loose enough to be easily
operated with one hand, on the ramp, in the rain. I decided a stud of the proper
length was installed if, when closed, its head was about flush with the top of
the grommet. Those that had that appearance usually operated the way I wanted
them to. The fit check showed that some met this standard but some didn't. So I
did some swapping until they did. (I put squares of masking tape next to the
ones I wanted to replace. This helped minimize the number of times I had to
completely latch and unlatch the doors.)
This is why SkyBolt's kit -- and I assume the
kits of others -- include more studs than you'll need.
I'll monitor the new Camlocs to see if any pop up
unexpectedly. If that happens, I'll have spares to try a shorter (tighter) stud.
The entire effort took a bit less than five hours
-- about two hours for the first door and an hour each for the remaining three.
No paint scratched, blood drawn, etc., for a change.
The special pliers I bought from Aircraft Spruce
are of Harbor Freight quality. (They're sold as "economy" pliers, however.) The
cost $15 and are adequate for rare use. One could make a tool that would do the
same job, but he'd have to be careful, as some dimensions are critical. The
ring-setting tool is made my Mil-Spec is also cheap. It worked adequately, but
it was a wee bit oversized for the grommets and this created hassles. $20 or so.
|


